Easy Cookie Icing (Without Eggs)

Top view of an easy cookie icing being mixed in a small bowl with a hand whisk

Sugar cookies are delicious by themselves, but the icing is what makes them festive and beautiful. This easy cookie icing not only lifts the look to the next level but also adds an extra layer of flavor.

Why you will love this icing

First, it’s made of four simple ingredients (plus coloring) you most probably have in your kitchen right now. Second, this icing is super easy to make, it’s simply mixed by hand in one bowl. This means you can make a small amount, in case you run out of it quicker than planned or wish to decorate just a few cookies. Third, this icing is actually tasty and pleasant to eat when hardened! It’s sweet, but you can really feel vanilla in it. Moreover, you can add juice or powdered lyophilized berries, without ruining the texture, and make it even tastier. It hardens enough, but not as hard candy, it feels pleasantly soft when you taste it.

This easy cookie icing vs royal icing

Royal icing is classic, so why should you choose this icing to decorate your cookies?

  • As already mentioned above, this easy icing tastes better and is more pleasant to eat.
  • You don’t need any special skills to make it, anyone, even children can do it. And I would not say this about royal icing.
  • From my personal experience, this icing works better with natural powders, and it’s a huge plus if you are into natural coloring like me.

A few cons of this icing:

  • It is slightly transparent, so it’s not possible to make it bright white. Vanilla extract makes it even more ivory. You can skip the extract, but it will not change the transparency. Because of that, I don’t recommend drawing details with white icing on top of another color, it will look… strange. If bright white color and fully opaque icing are important to you, choose royal icing.
  • This icing has a very viscous texture and is not very obedient, so it’s not easy to draw small details precisely. For detailed and intricate designs nothing beats royal icing.

If I had to say it in one sentence, choose this icing if you don’t want to work too hard and the flavor is more important to you than an intricate look.

Close up of snowflake shaped sugar cookie decorated with easy cookie icing and gold sprinkles

How to color this cookie icing?

The easiest way to color any icing is gel food coloring. It’s concentrated, so you can get intense colors with little amount and it will not change the texture of the icing. You can also use any other type of food coloring, from liquid to powder. Even if liquid coloring will slightly thin the icing, you can always mix in a bit more icing sugar and fix the texture.

If you are more into natural coloring like me, there are also some interesting options. One option is powdered food products: matcha powder for warm green color, spirulina powder for dark green color, and lyophilized powdered berries, for all shades of pink or purple. Natural powders will not create a super smooth color and darker dots will be visible, but personally, I don’t see any problem with that. Another option is intense color juice: blueberry, grape, beetroot, or red cabbage. But keep in mind that this icing takes in flavors well and adding juice or powder means adding flavor. So be very careful with such things as cabbage, beetroot, or turmeric powder, use only tiny amounts for pastel colors. Well, unless you are making ayurvedic cookies or something like that.

How to flavor this cookie icing?

I’ve already added vanilla extract to a recipe ingredient list. And basic icing really tastes like vanilla! But extra flavors are also possible. Feel free to change vanilla with almond, mint, or orange extract. Try adding spices, like cinnamon for example. As I already mentioned, you can add lyophilized powdered berries for both color and flavor. Don’t worry if it slightly changes the icing consistency, you can easily fix it with some extra milk. Also, you can change part of the milk in the recipe with juice: orange, lemon, apple, pineapple, grape… Anything that your creativity allows.

What cookies to decorate with this icing?

This icing goes best with vanilla sugar cookies, but you can use it for any other cut-out cookies or gingerbread.

Snowflake shaped sugar cookies decorated with easy cookie icing and sprinkles

How to decorate cookies with this cookie icing?

To decorate cookies with this icing you can use drip bottles or pipping bags, anything you prefer. You can use piping tips or simply cut off the tip of the piping bag. Actually, any plastic bag can work as a piping bag, as long as it’s not very thin and soft.

If you are using piping tips, I recommend also using adapters. This way you will be able to comfortably change tips between bags, or easily wash the tips in case they get clogged.

To flood the cookies with icing, a small tip or small bag hole is best. This way is easier to control the amount of icing and you can flood it with a thin icing layer. You can use the same tip both for outlining and flooding the shape, simply use less pressure when outlining and more pressure when flooding. I use Wilton #3 piping tip for this process.

As this icing is not as obedient as royal icing, I recommend using it for flooding the cookie and combining it with sprinkles. When the first icing layer dries, you can also draw some details on top. As long as they are made of simple dots and lines, this icing will work.

Fir tree shaped sugar cookies decorated with colorful cookie icing and gold sprinkles

How to store this cookie icing?

It’s best to use this icing the same day you’ve made it, but you can also store it in an airtight container in the fridge for a few days. If covered and not exposed to air, it will not crust but will thicken a bit. Let it come back to room temperature and mix well before using. If it still looks too thick after mixing, add some milk, a few drops at a time.

How long does it take for this icing to set?

After you’ve decorated cookies with this icing, leave them for at least 12 hours to set and fully dry in the open air at room temperature. If you’ve made a thick layer or added extra details on top, wait longer. Cookies should be safe to stack after 24 hours.

Keep in mind, that this icing is not as hard as candy. It’s safe to stack cookies when the icing fully dries, but make sure they don’t get pressed (while transporting them for example) because the icing can crack.

Top view of Christmas tree shaped sugar cookies decorated with colorful cookie icing and sprinkles

Easy Cookie Icing (Without Eggs)

Top view of an easy cookie icing being mixed in a small bowl with a hand whisk

Sugar cookies are delicious by themselves, but the icing is what makes them festive and beautiful. This easy cookie icing not only lifts the look to the next level but also adds an extra layer of flavor.

  • Prep Time5 min

Ingredients

  • 400 g / 14,1 oz icing sugar
  • 75 g / 2,6 oz milk
  • 1 tsp vanilla extract
  • ¼ teaspoon salt
  • Food coloring or edible powders for coloring and flavoring

Directions

Prepare the icing

1

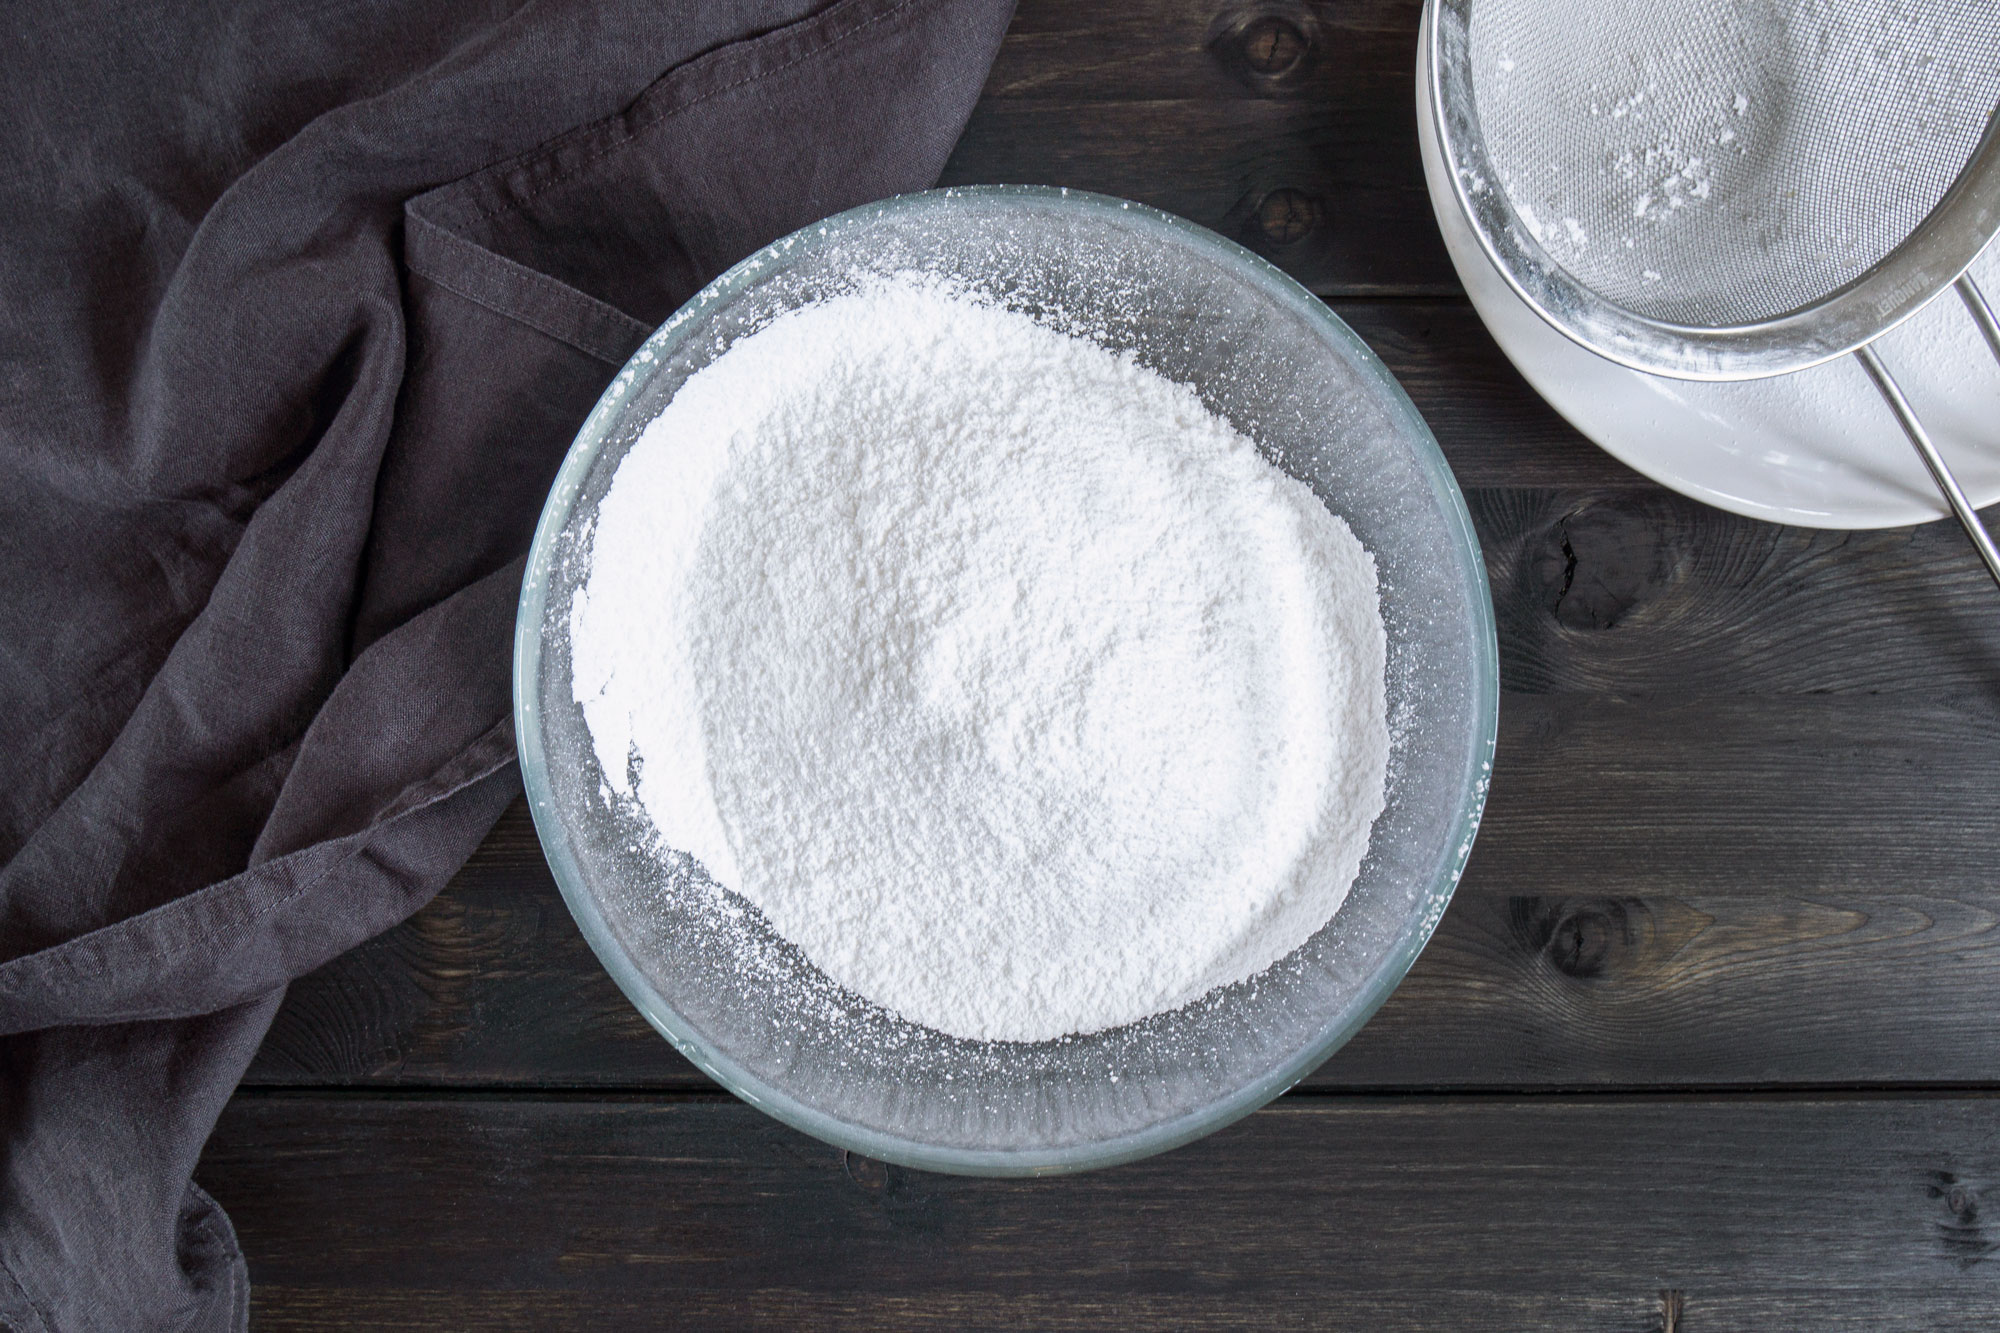
Sift the icing sugar into a big bowl.

Sifted icing sugar in a glass bpwl

2

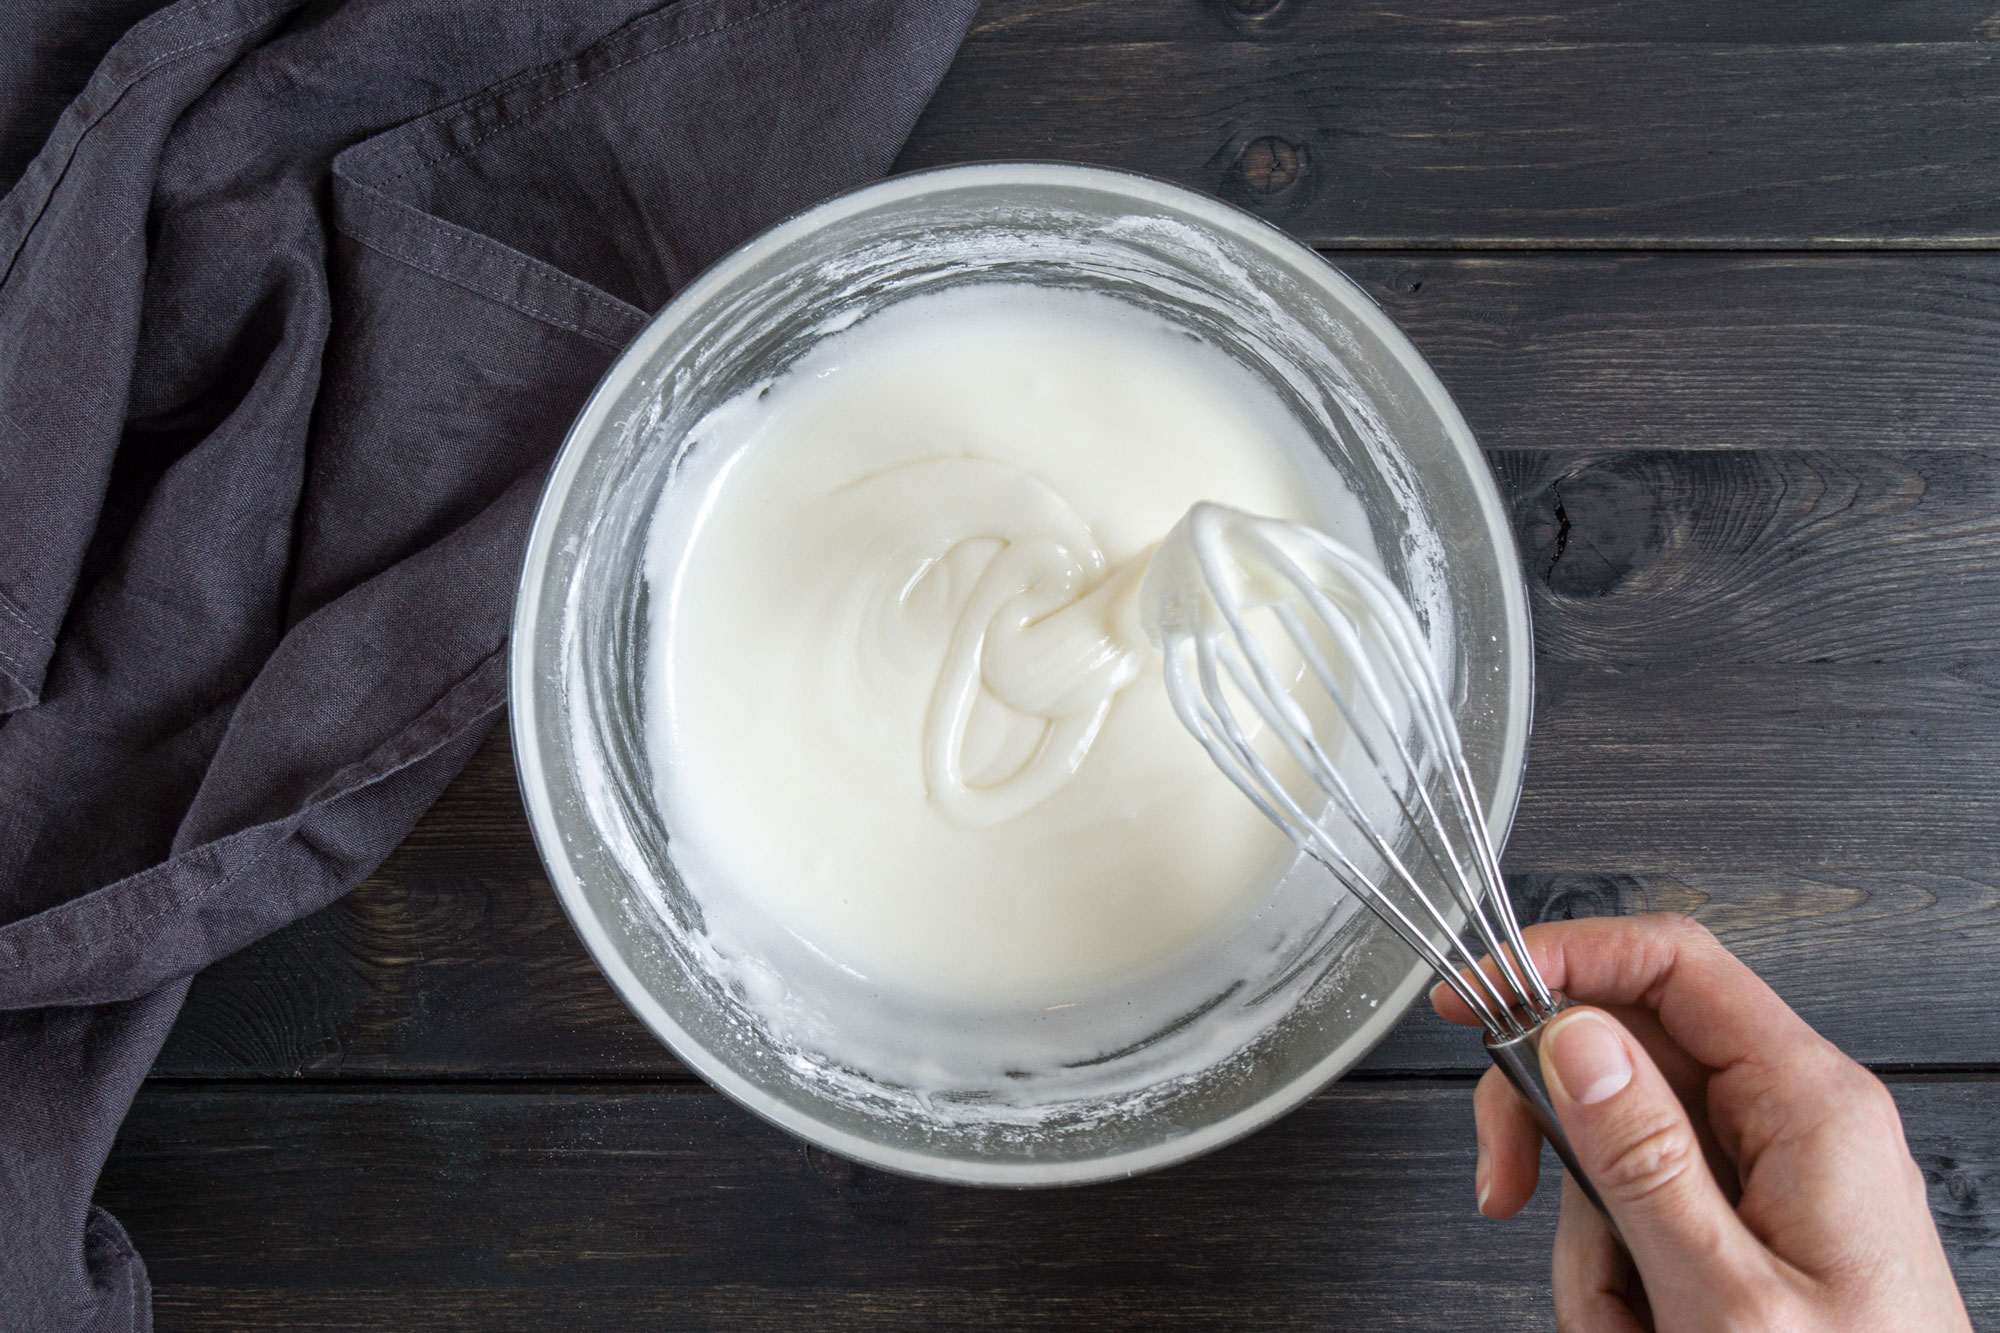
In a separate bowl combine milk, vanilla extract, and salt. Add the icing sugar a few spoons at a time and mix by hand to incorporate.

Mixing icing sugar with milk

3

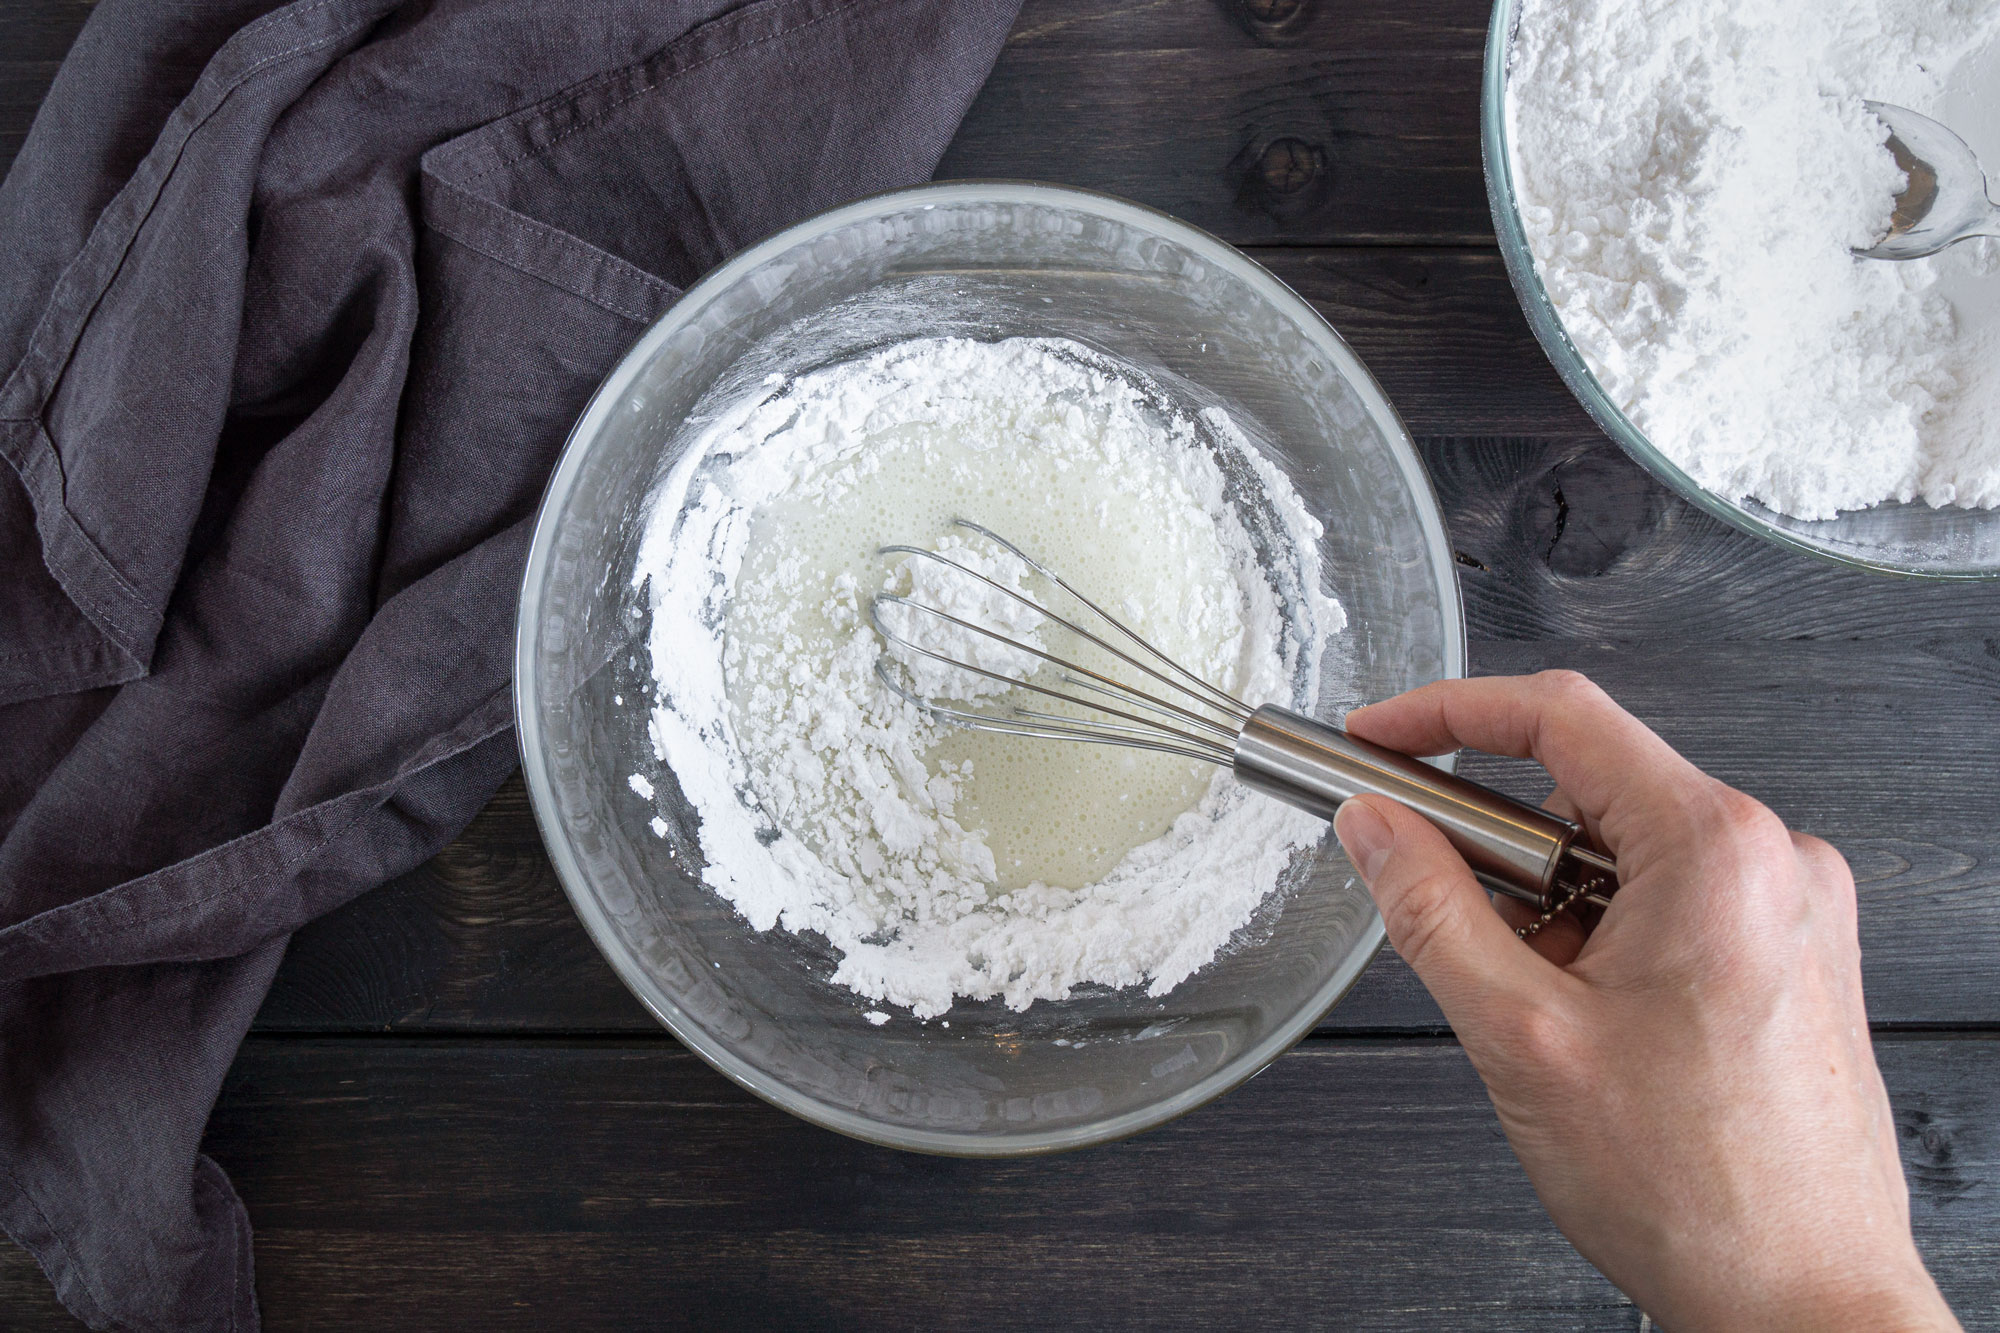
After adding and mixing in all the sugar, you should have a pretty thick and viscous consistency. When lifting the whisk, the icing should fall in ribbons. Those ribbons should level and disappear after 12-15 seconds.

Final cookie icing consistency

Cookie icing flood consistency

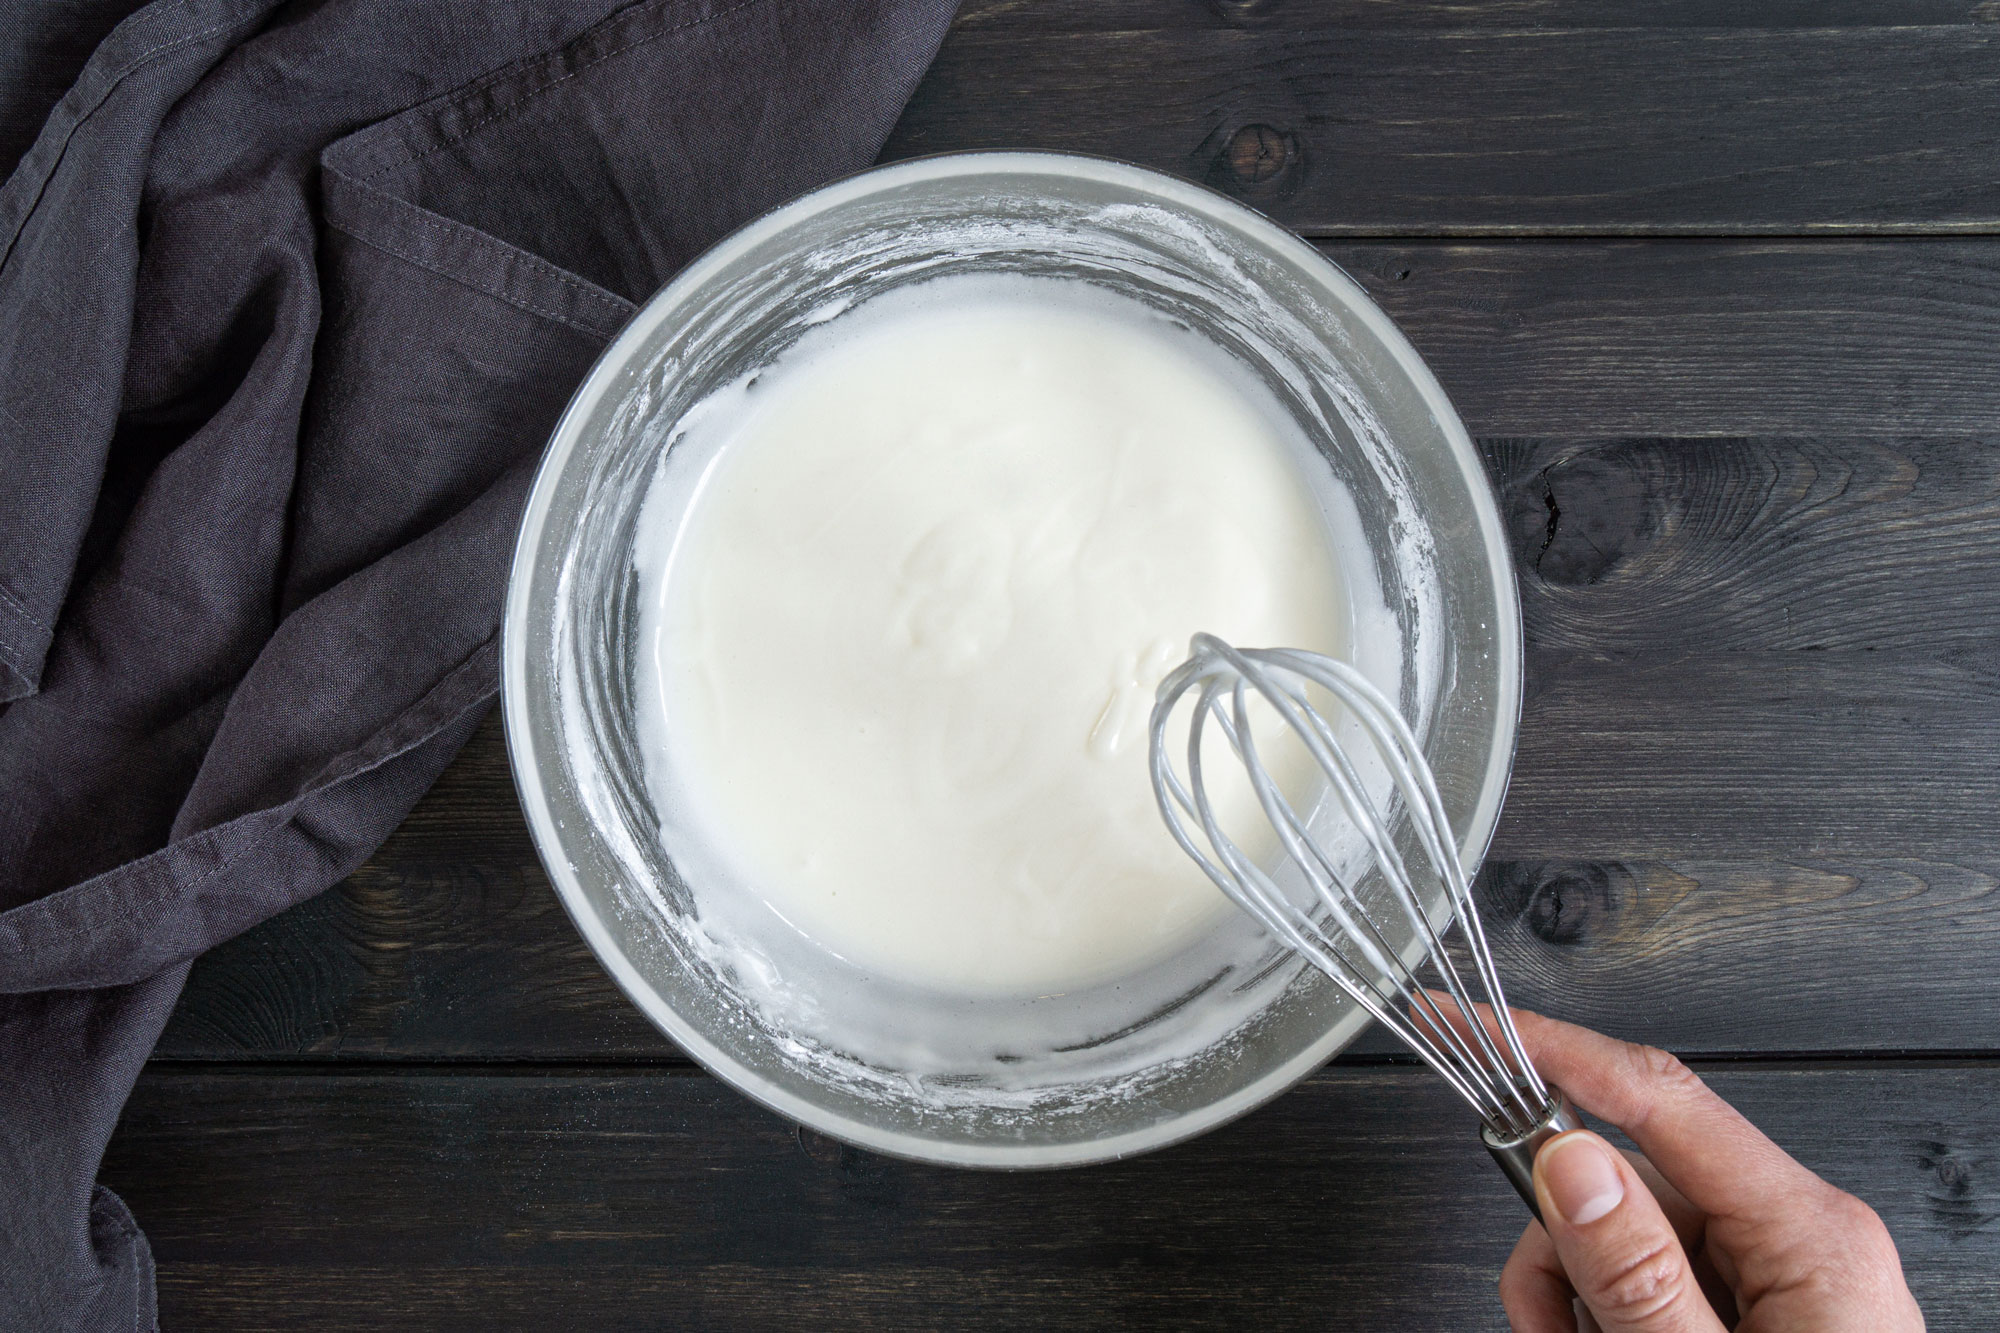
If your icing is too thin at this point, add a bit more icing sugar. If it looks a bit too thick, add extra milk, a few drops at a time.

4

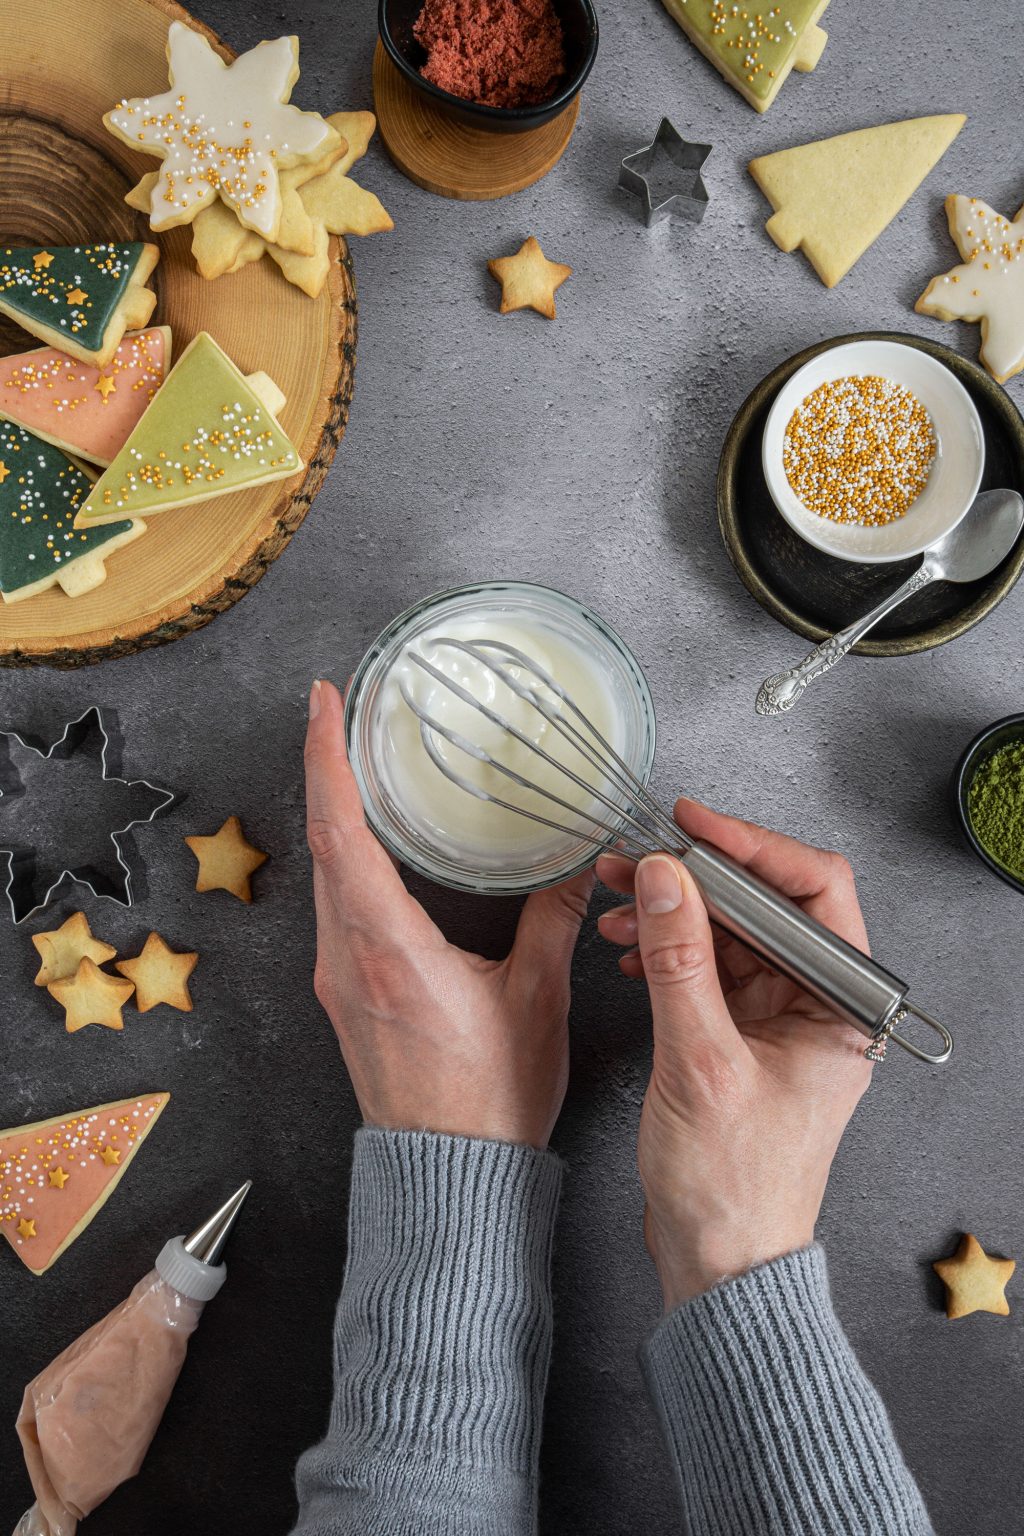
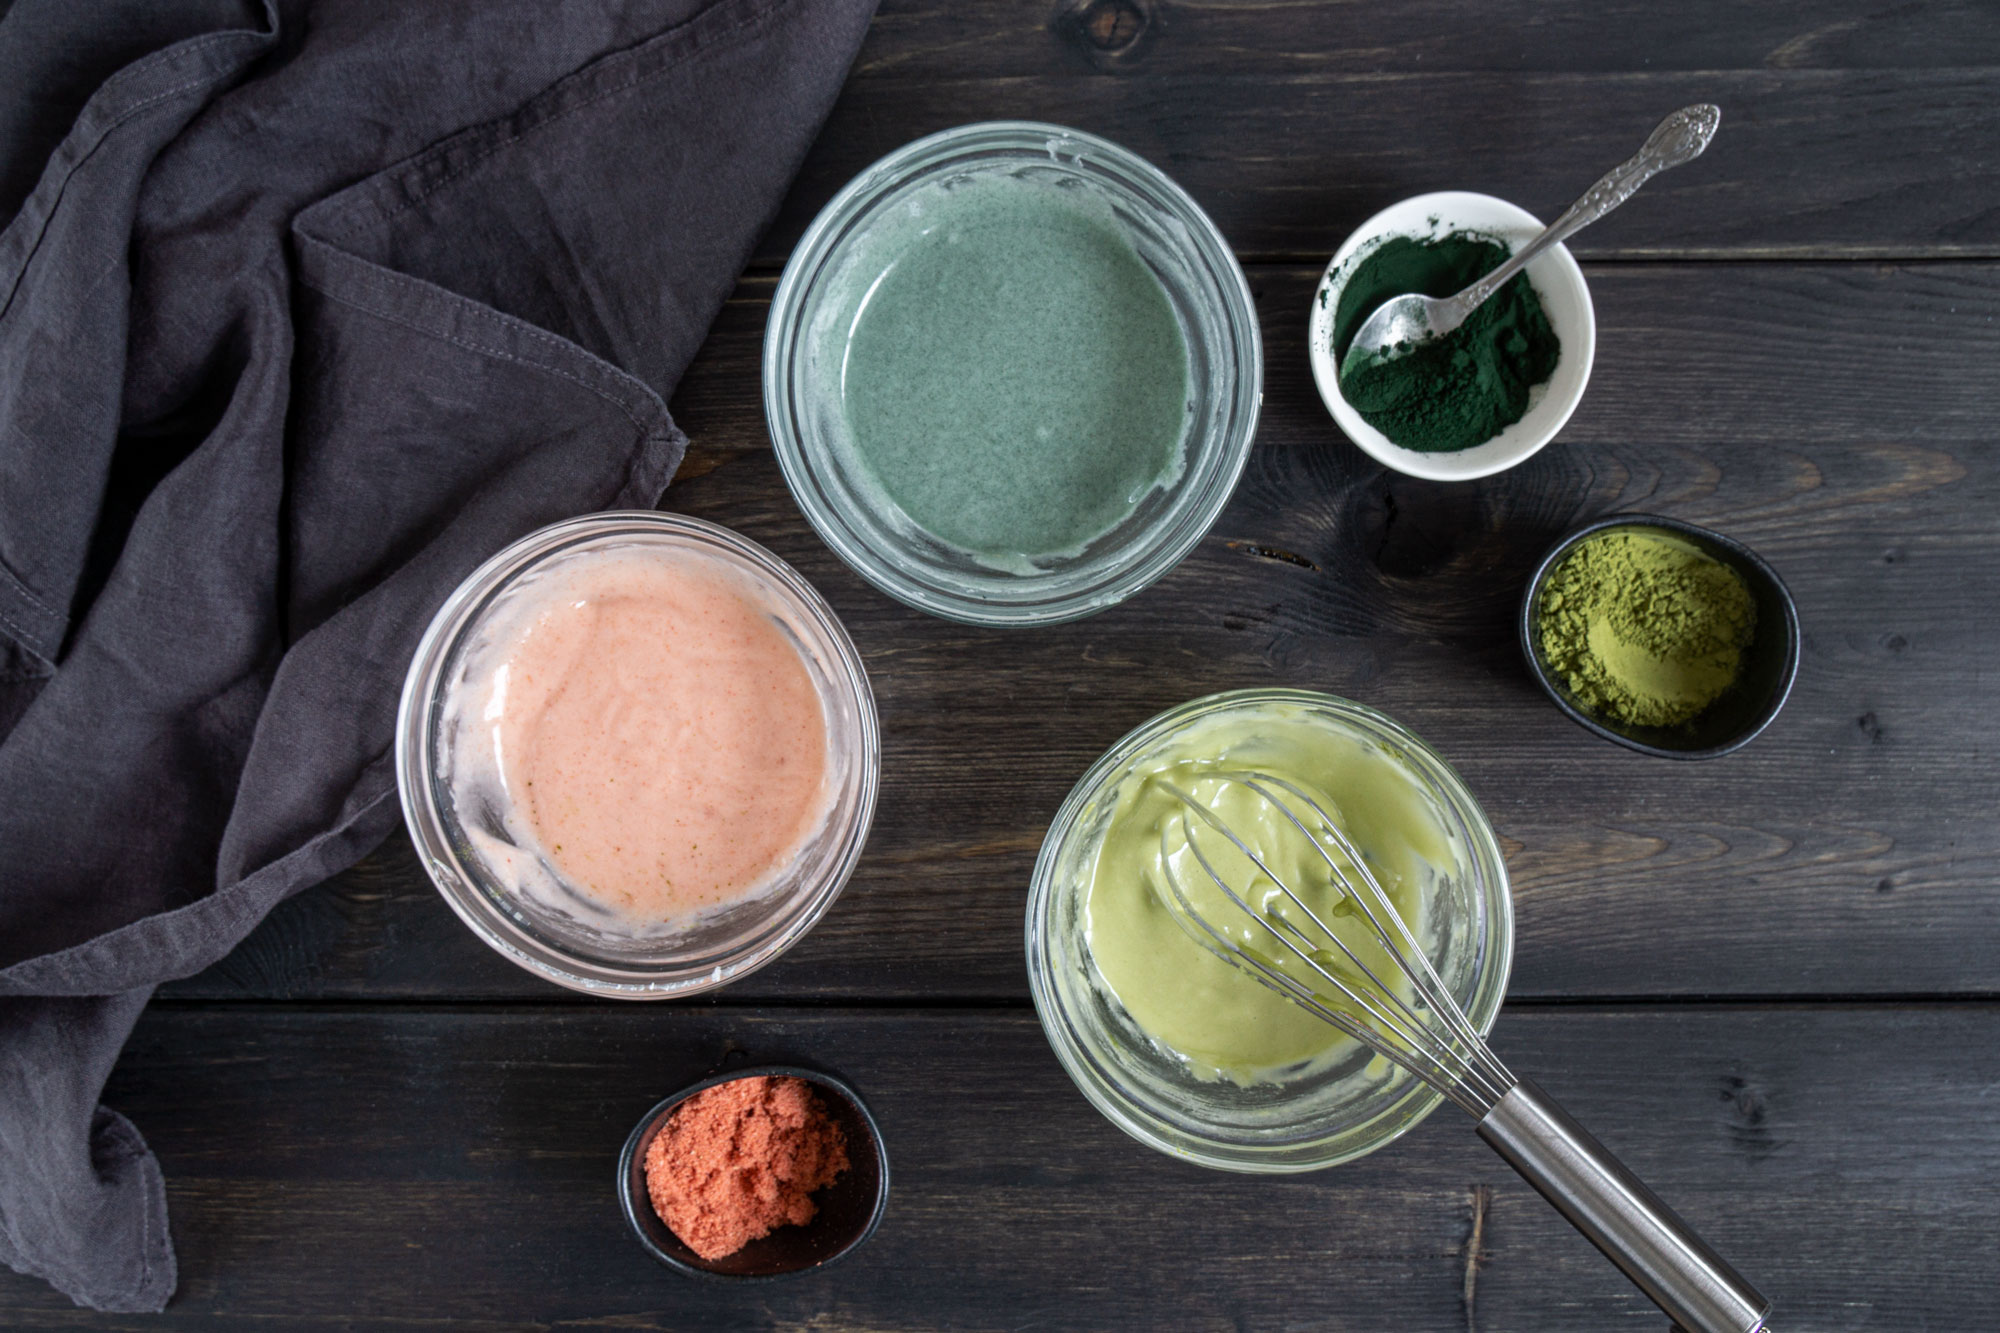
Divide the icing into separate bowls and color each with desired colors. Use food coloring, edible powders, or juice to add an extra layer of flavor. I used spirulina powder, matcha powder, and powdered lyophilized strawberries.

Naturally colored cookie icing

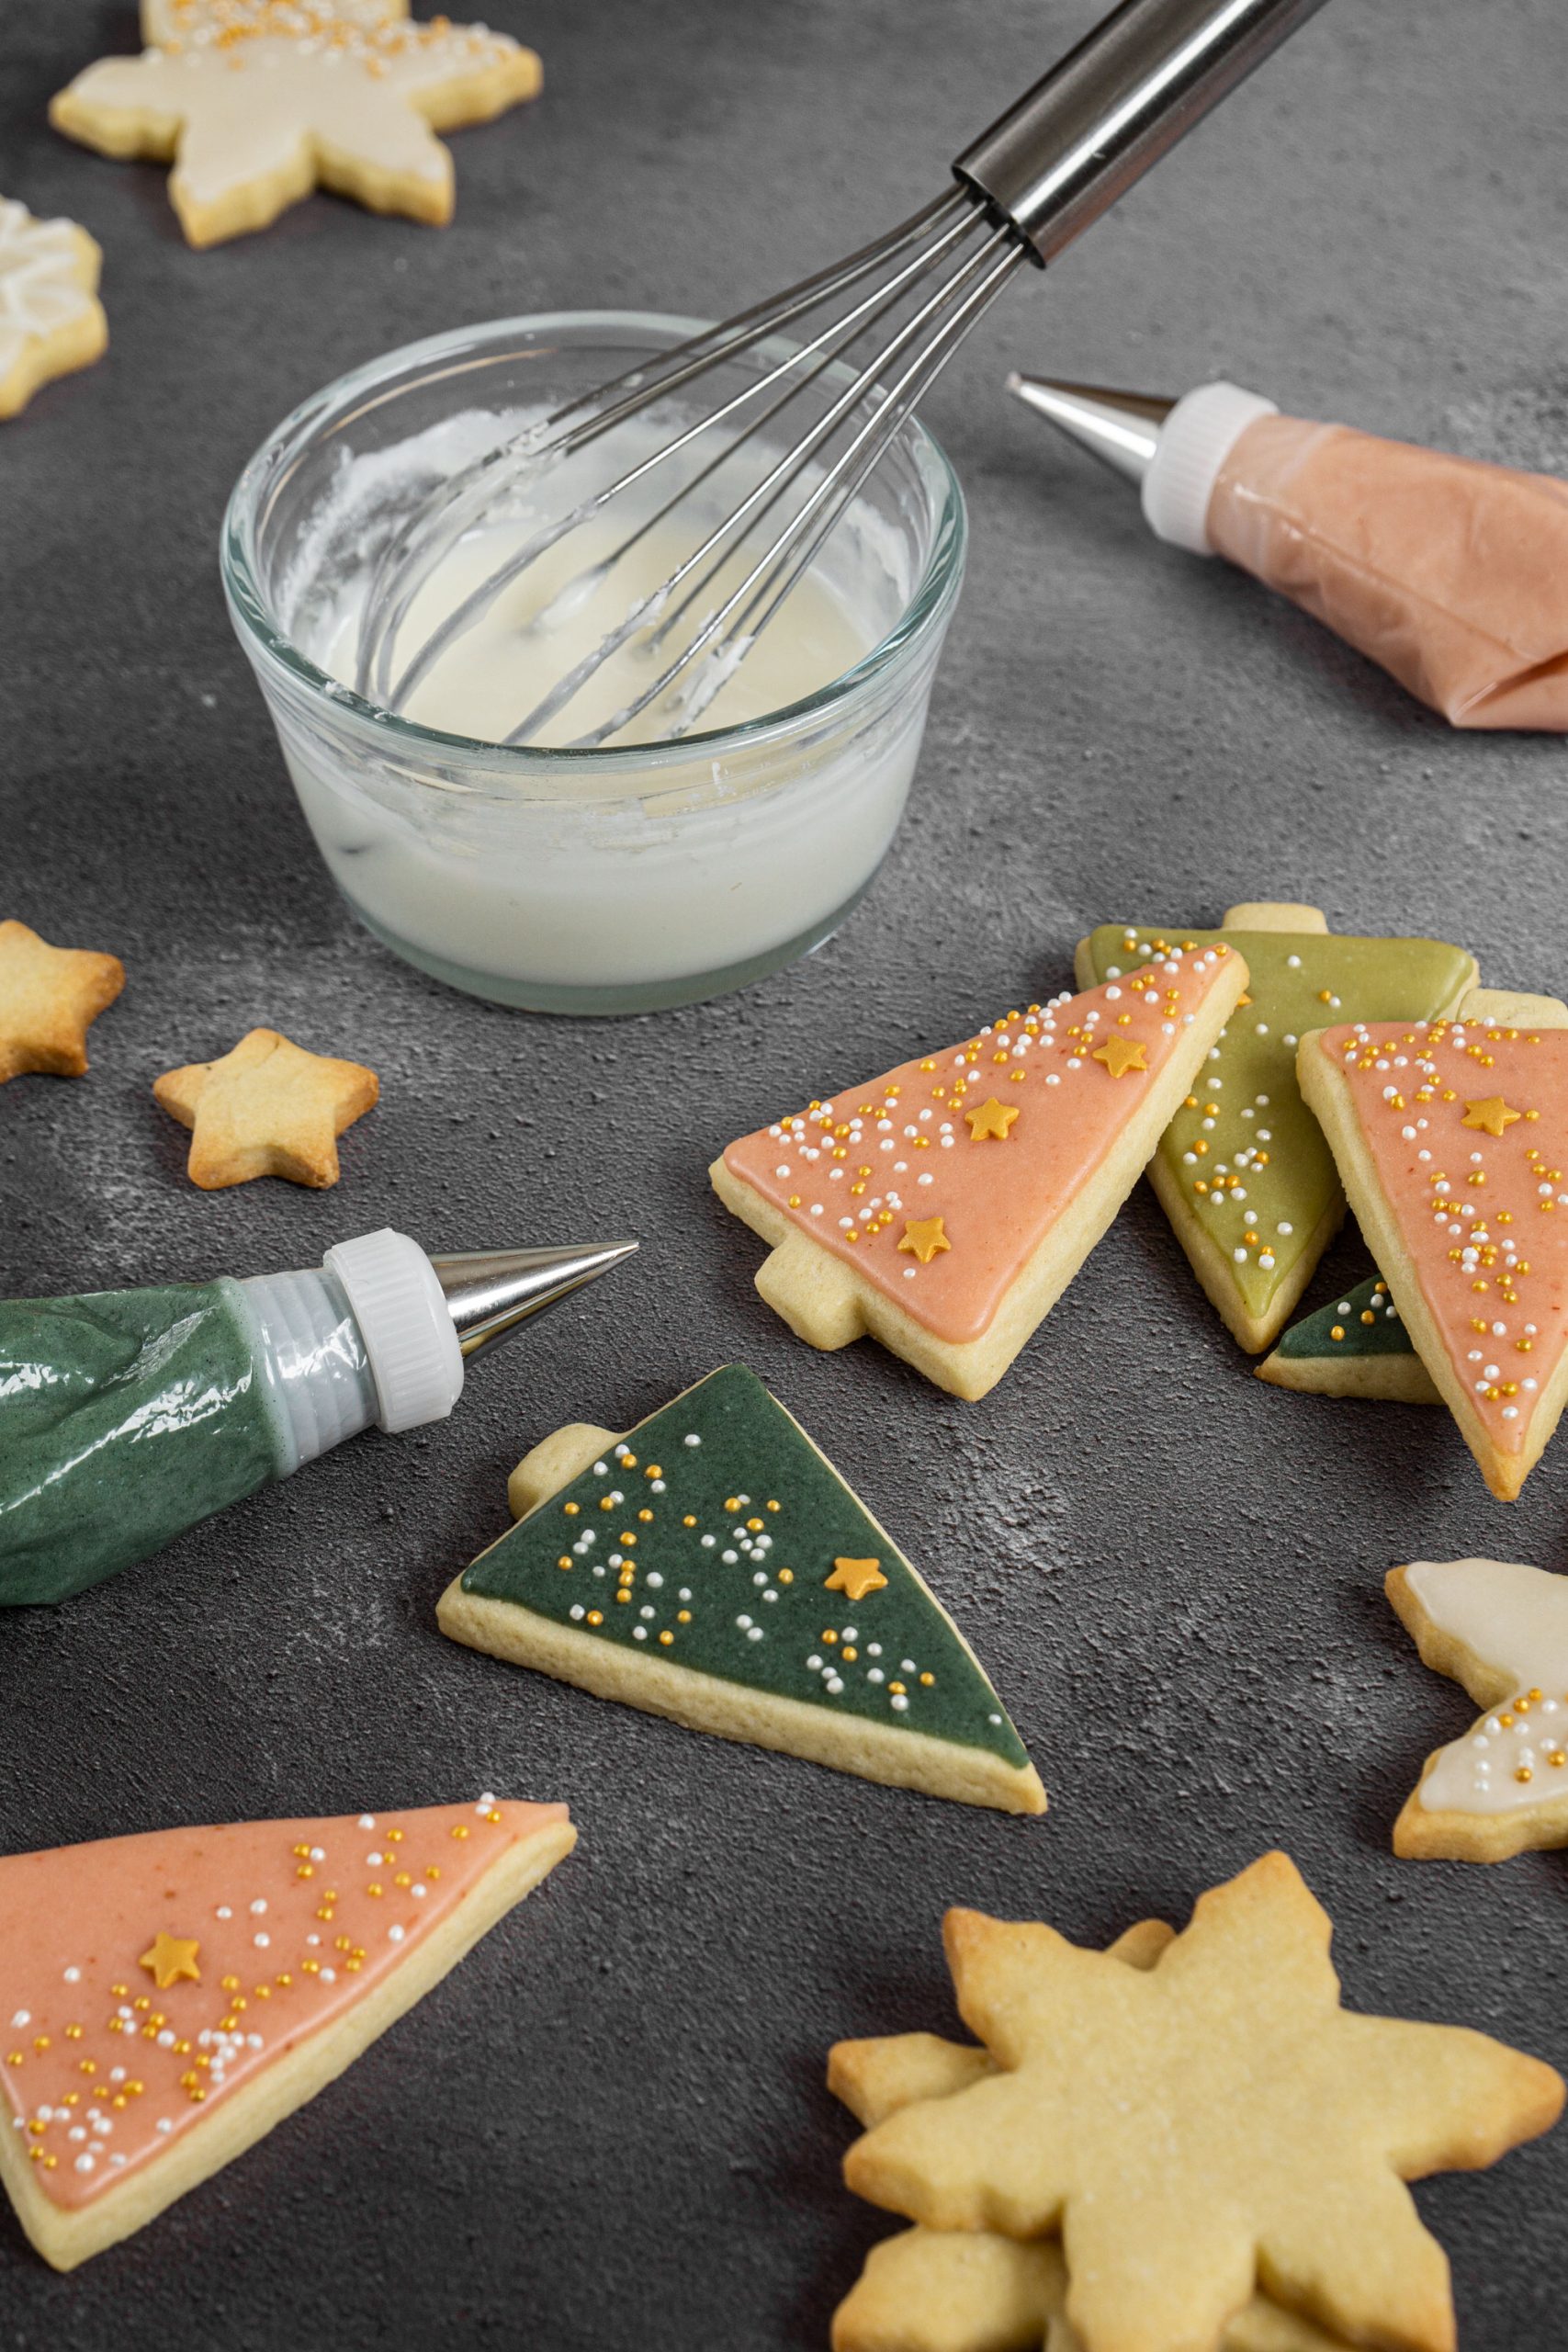
Decorate the cookies

1

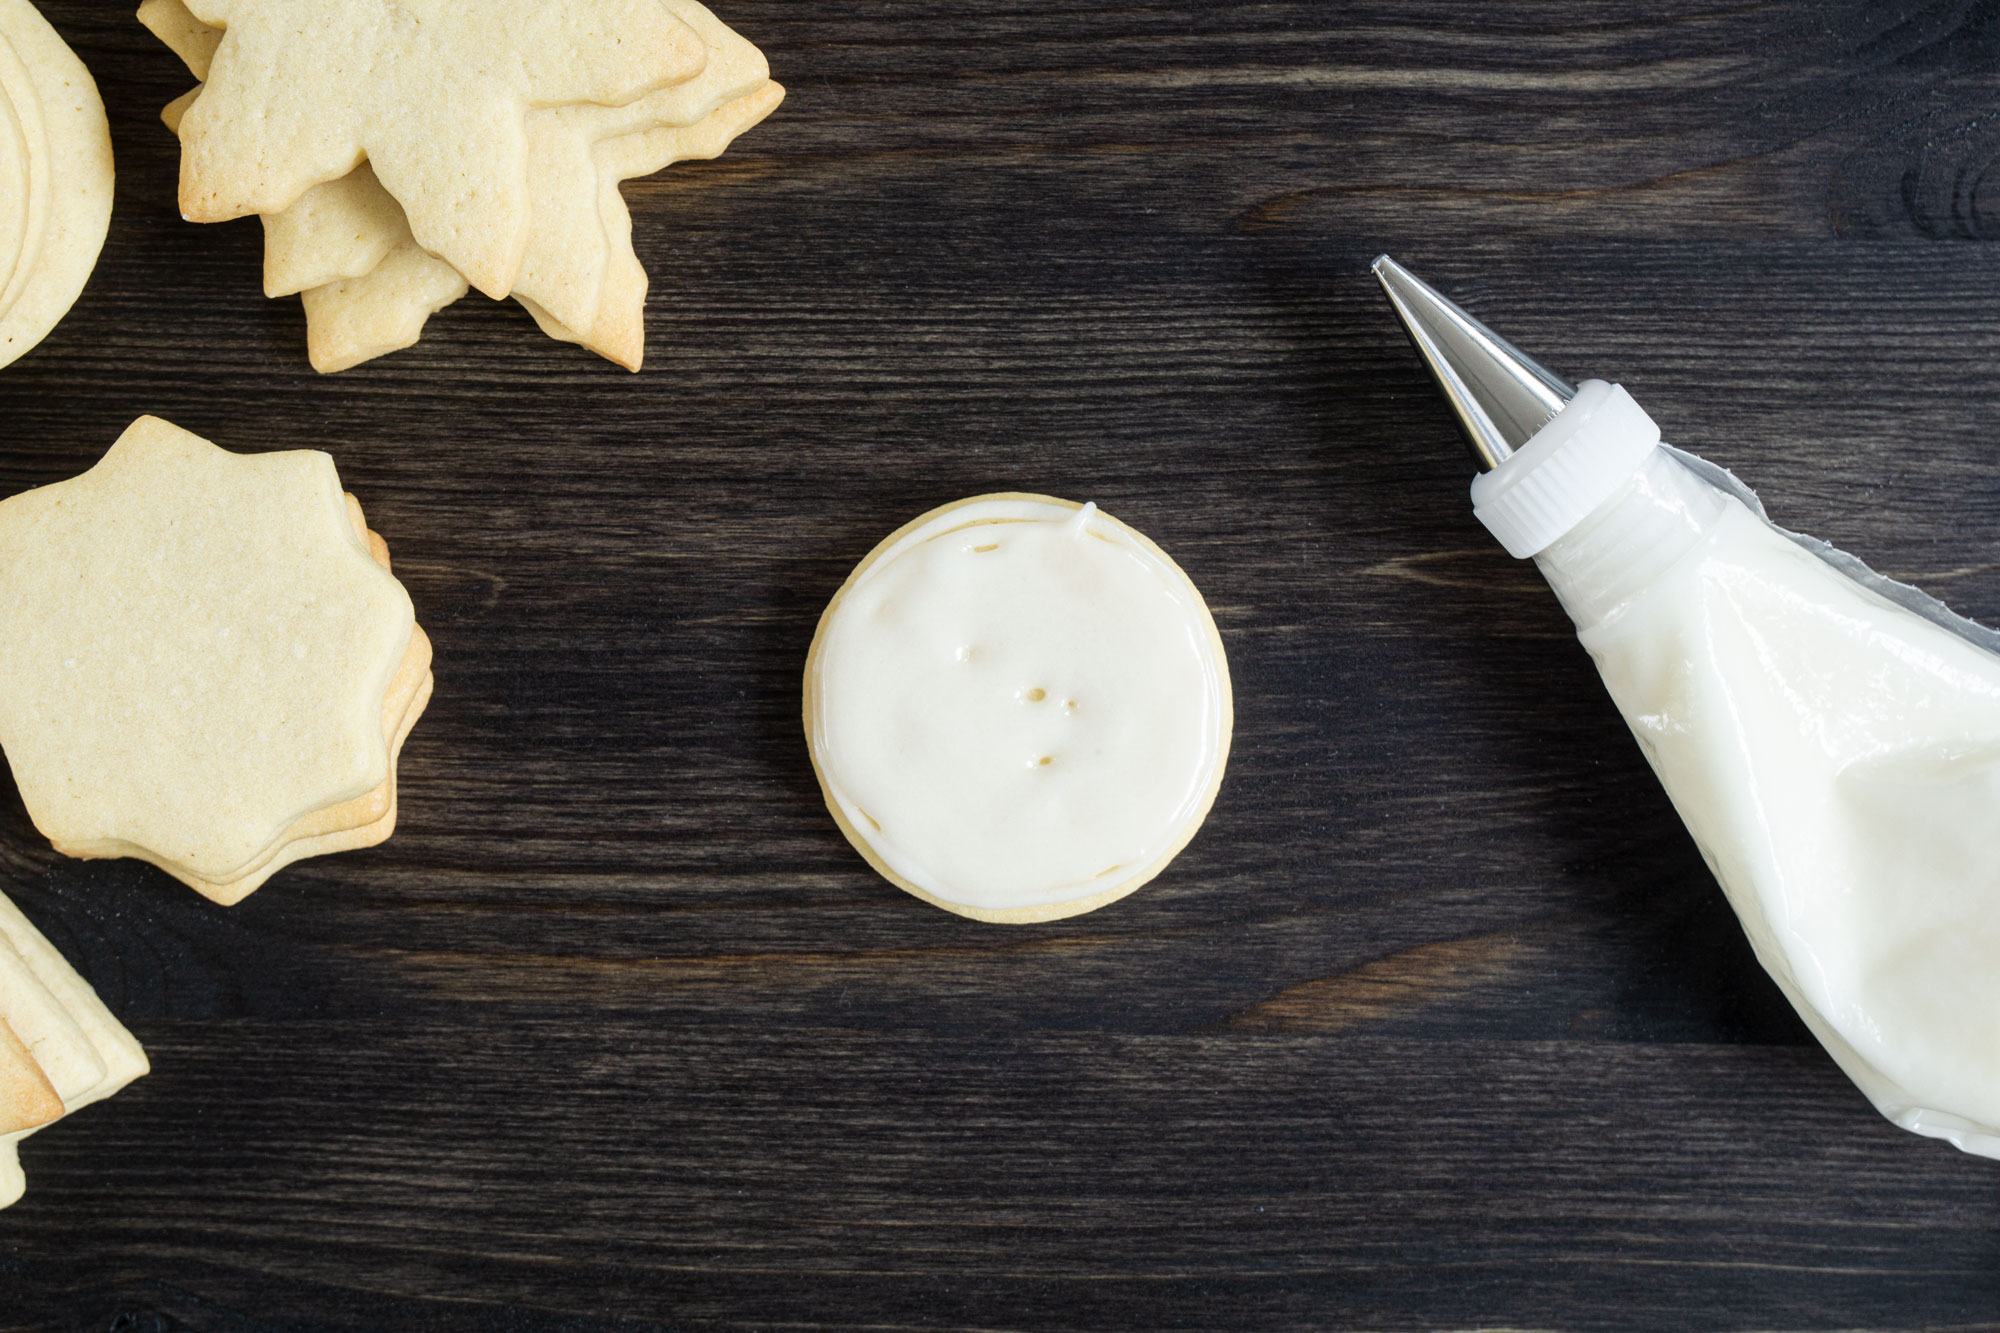
Transfer icing to piping bags or drip bottles.

2

Press the piping bag lightly with your fingers and draw a cookie shape outline with the icing.

Outlining a sugar cookie with easy cookie icing

3

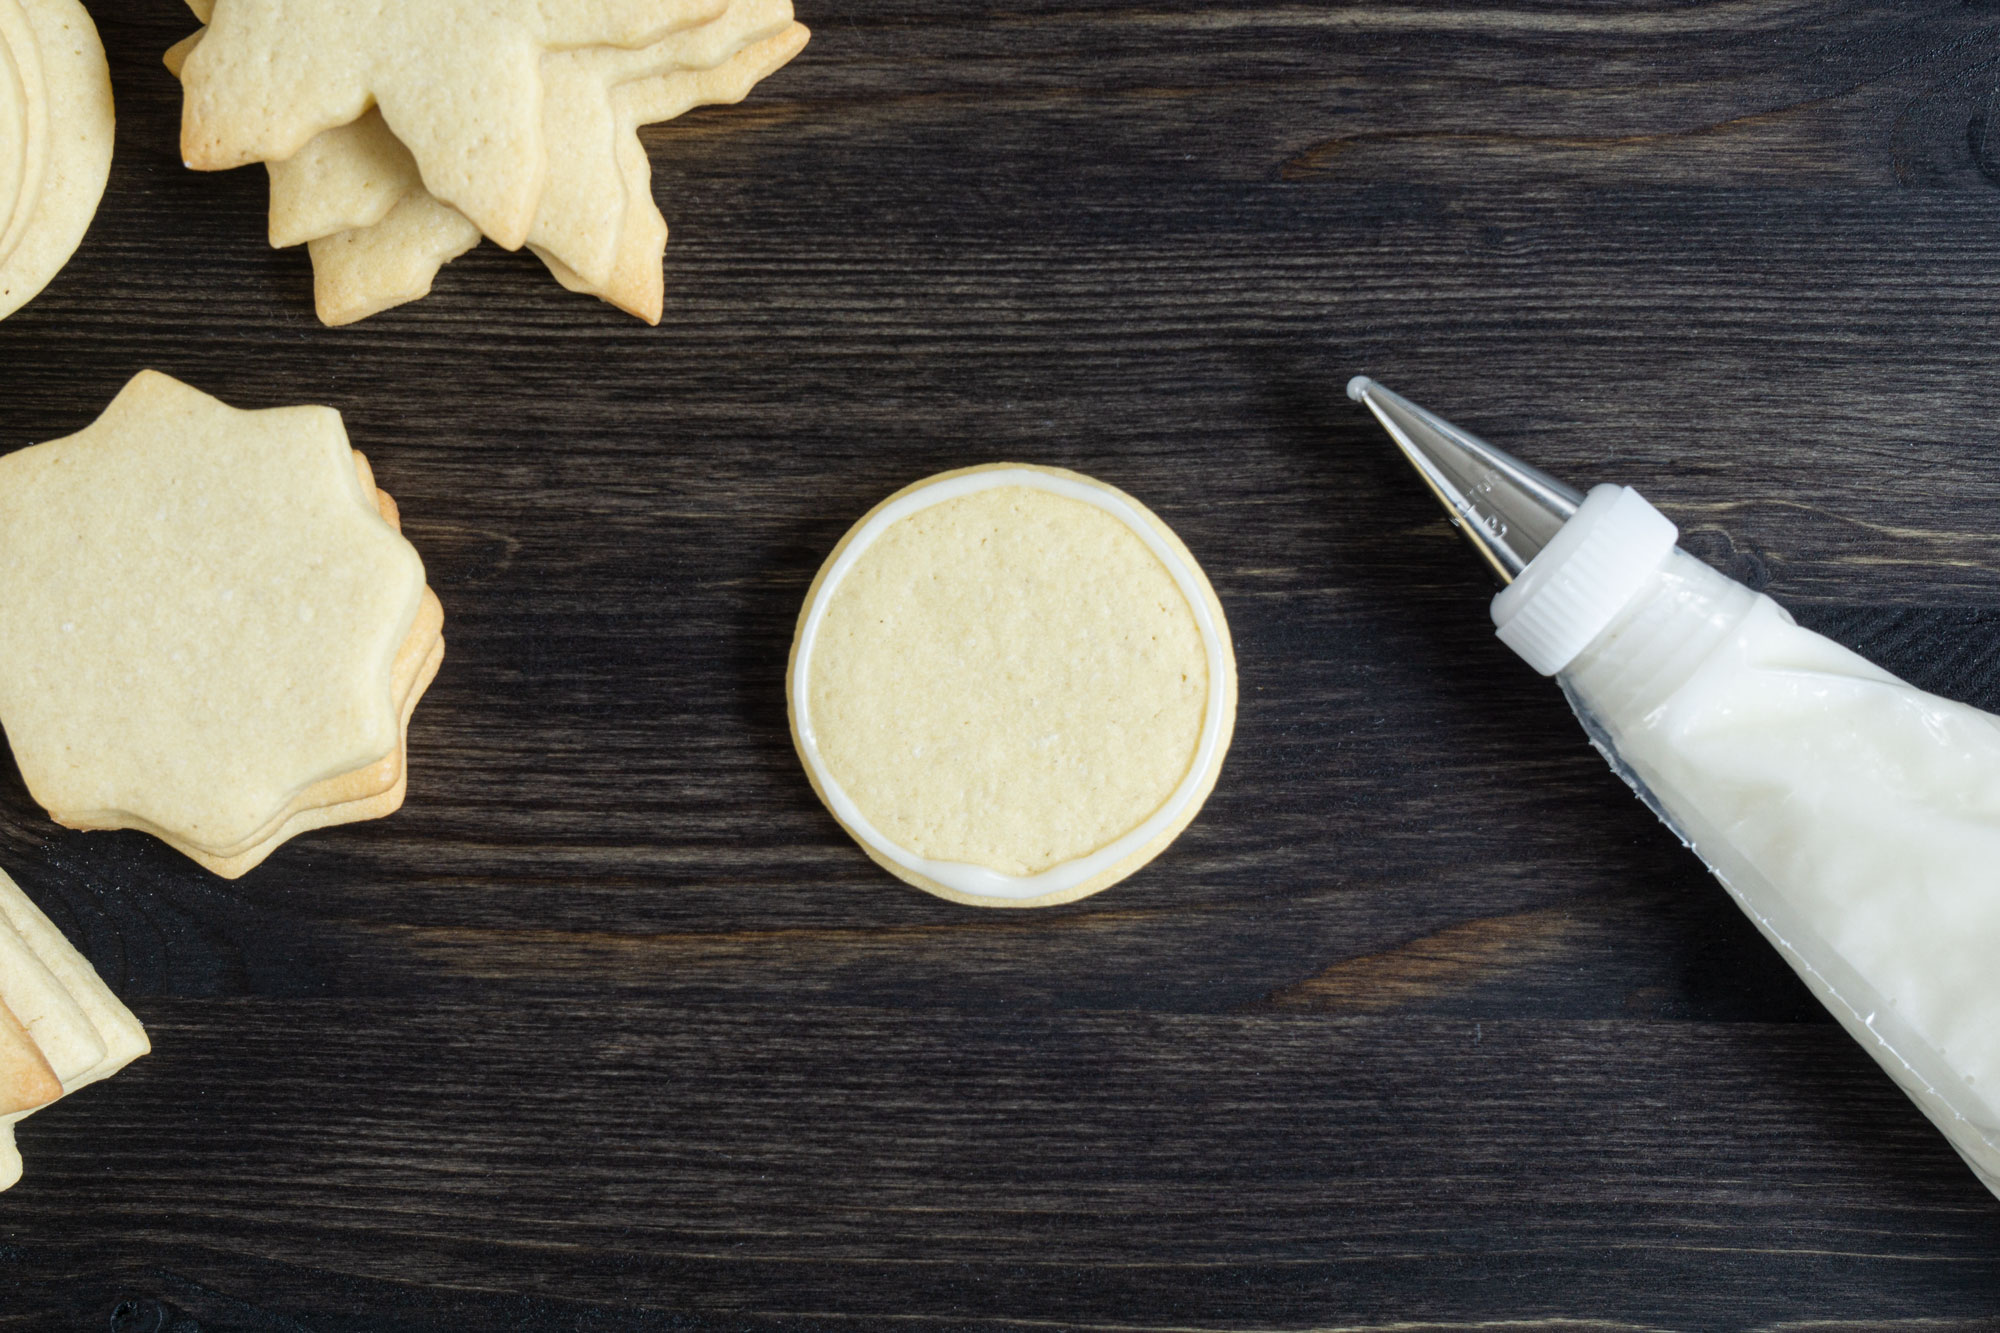
Without waiting for the outline to dry, adding slightly more pressure, immediately flood the inside of the shape with the icing. Don’t worry about little gaps.

Flooding a sugar cookie with easy cookie icing

4

Use a toothpick to move the icing around, fill the gaps and remove air bubbles, if there are any.

Fixing icing gaps with a toothbrush

5

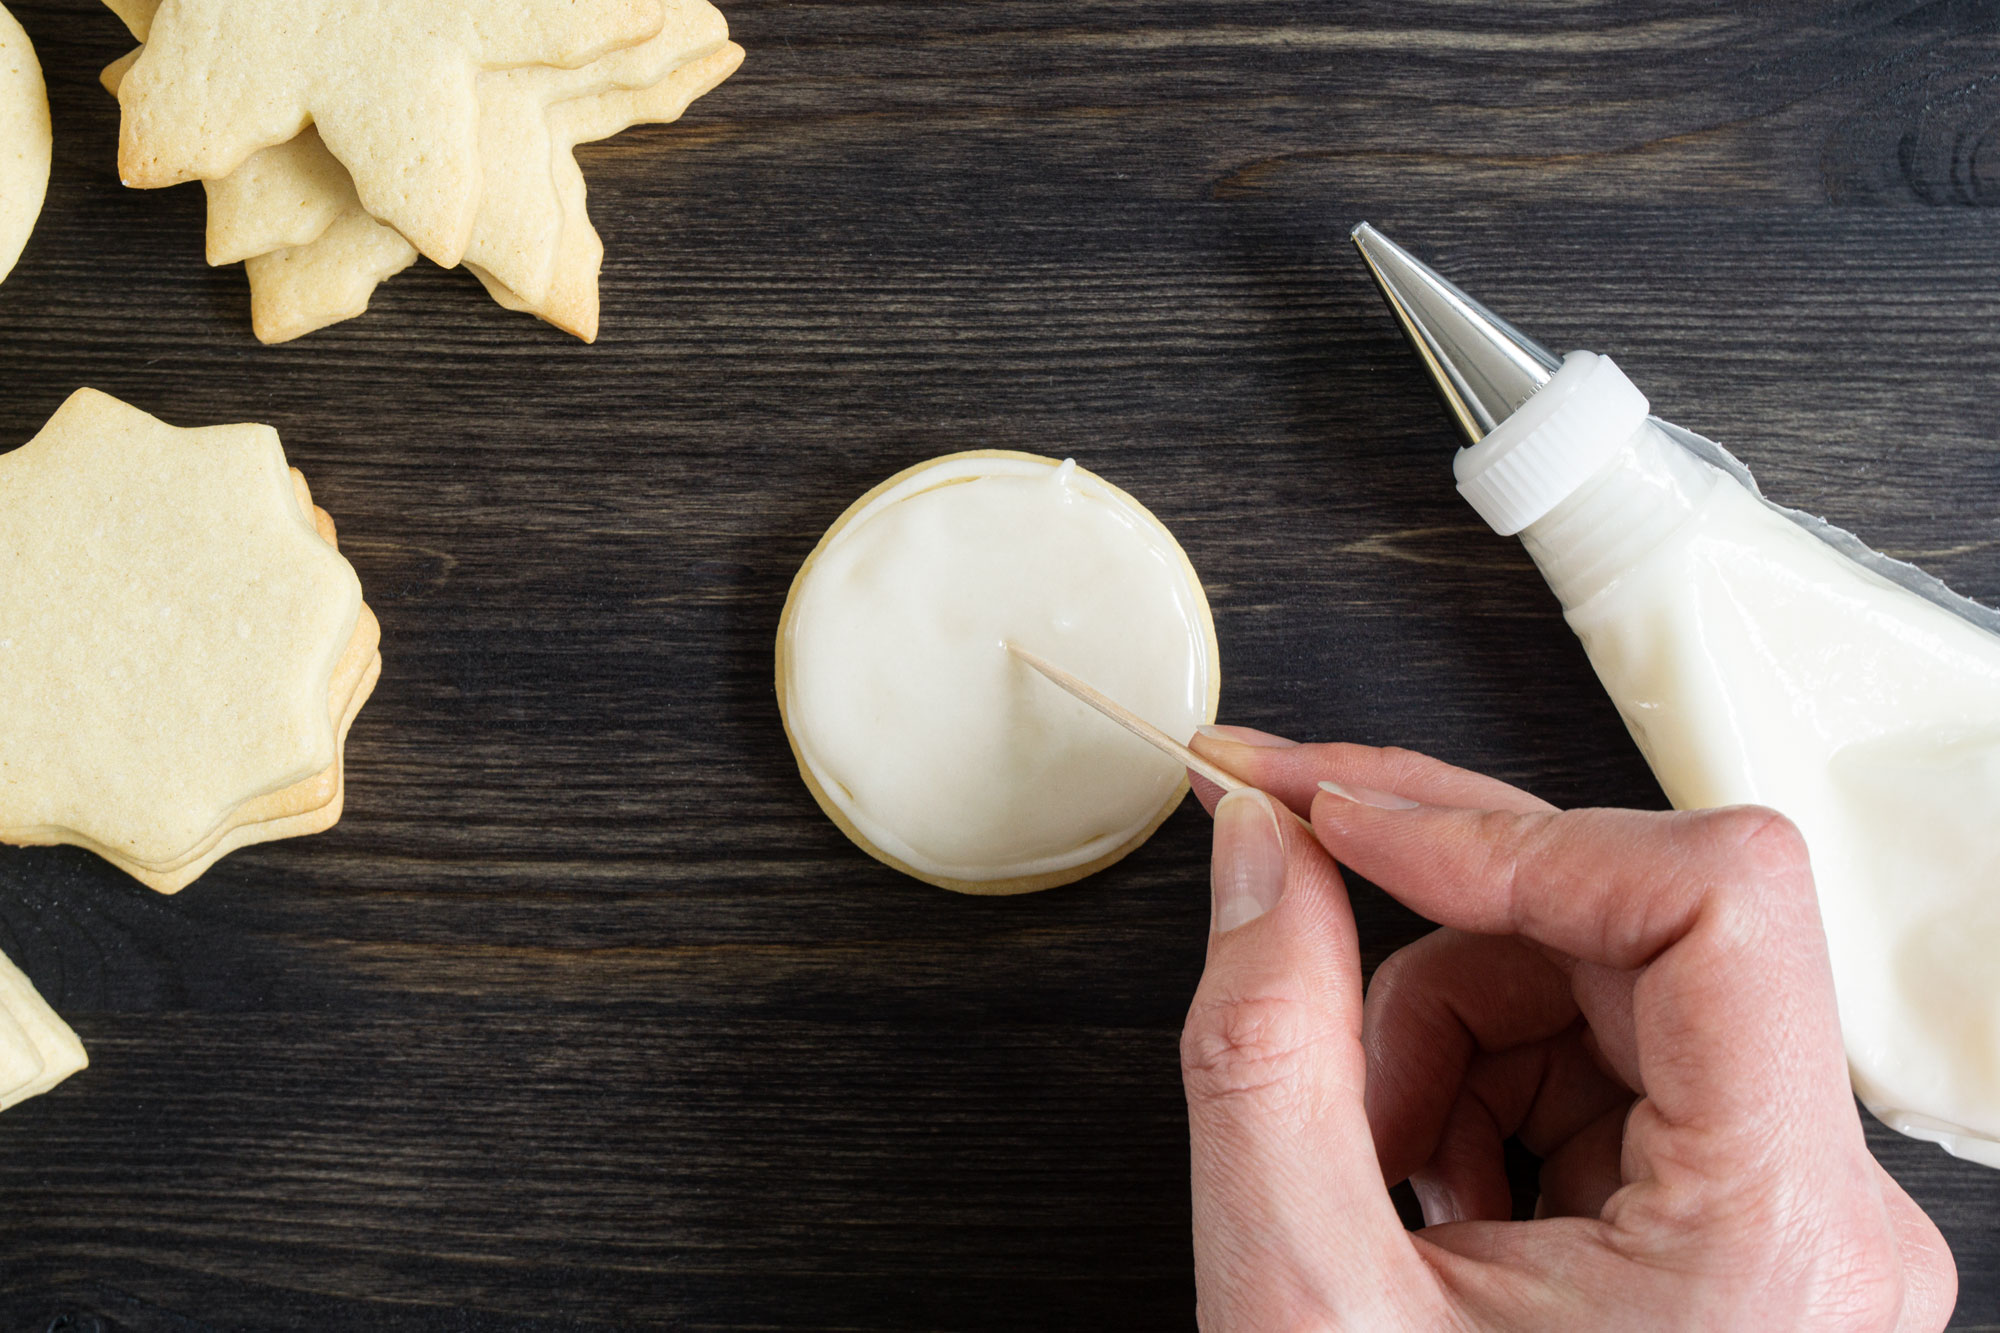
Lightly shake the cookie horizontally to help the icing to smooth faster.

A sugar cookie flooded with cookie icing

6

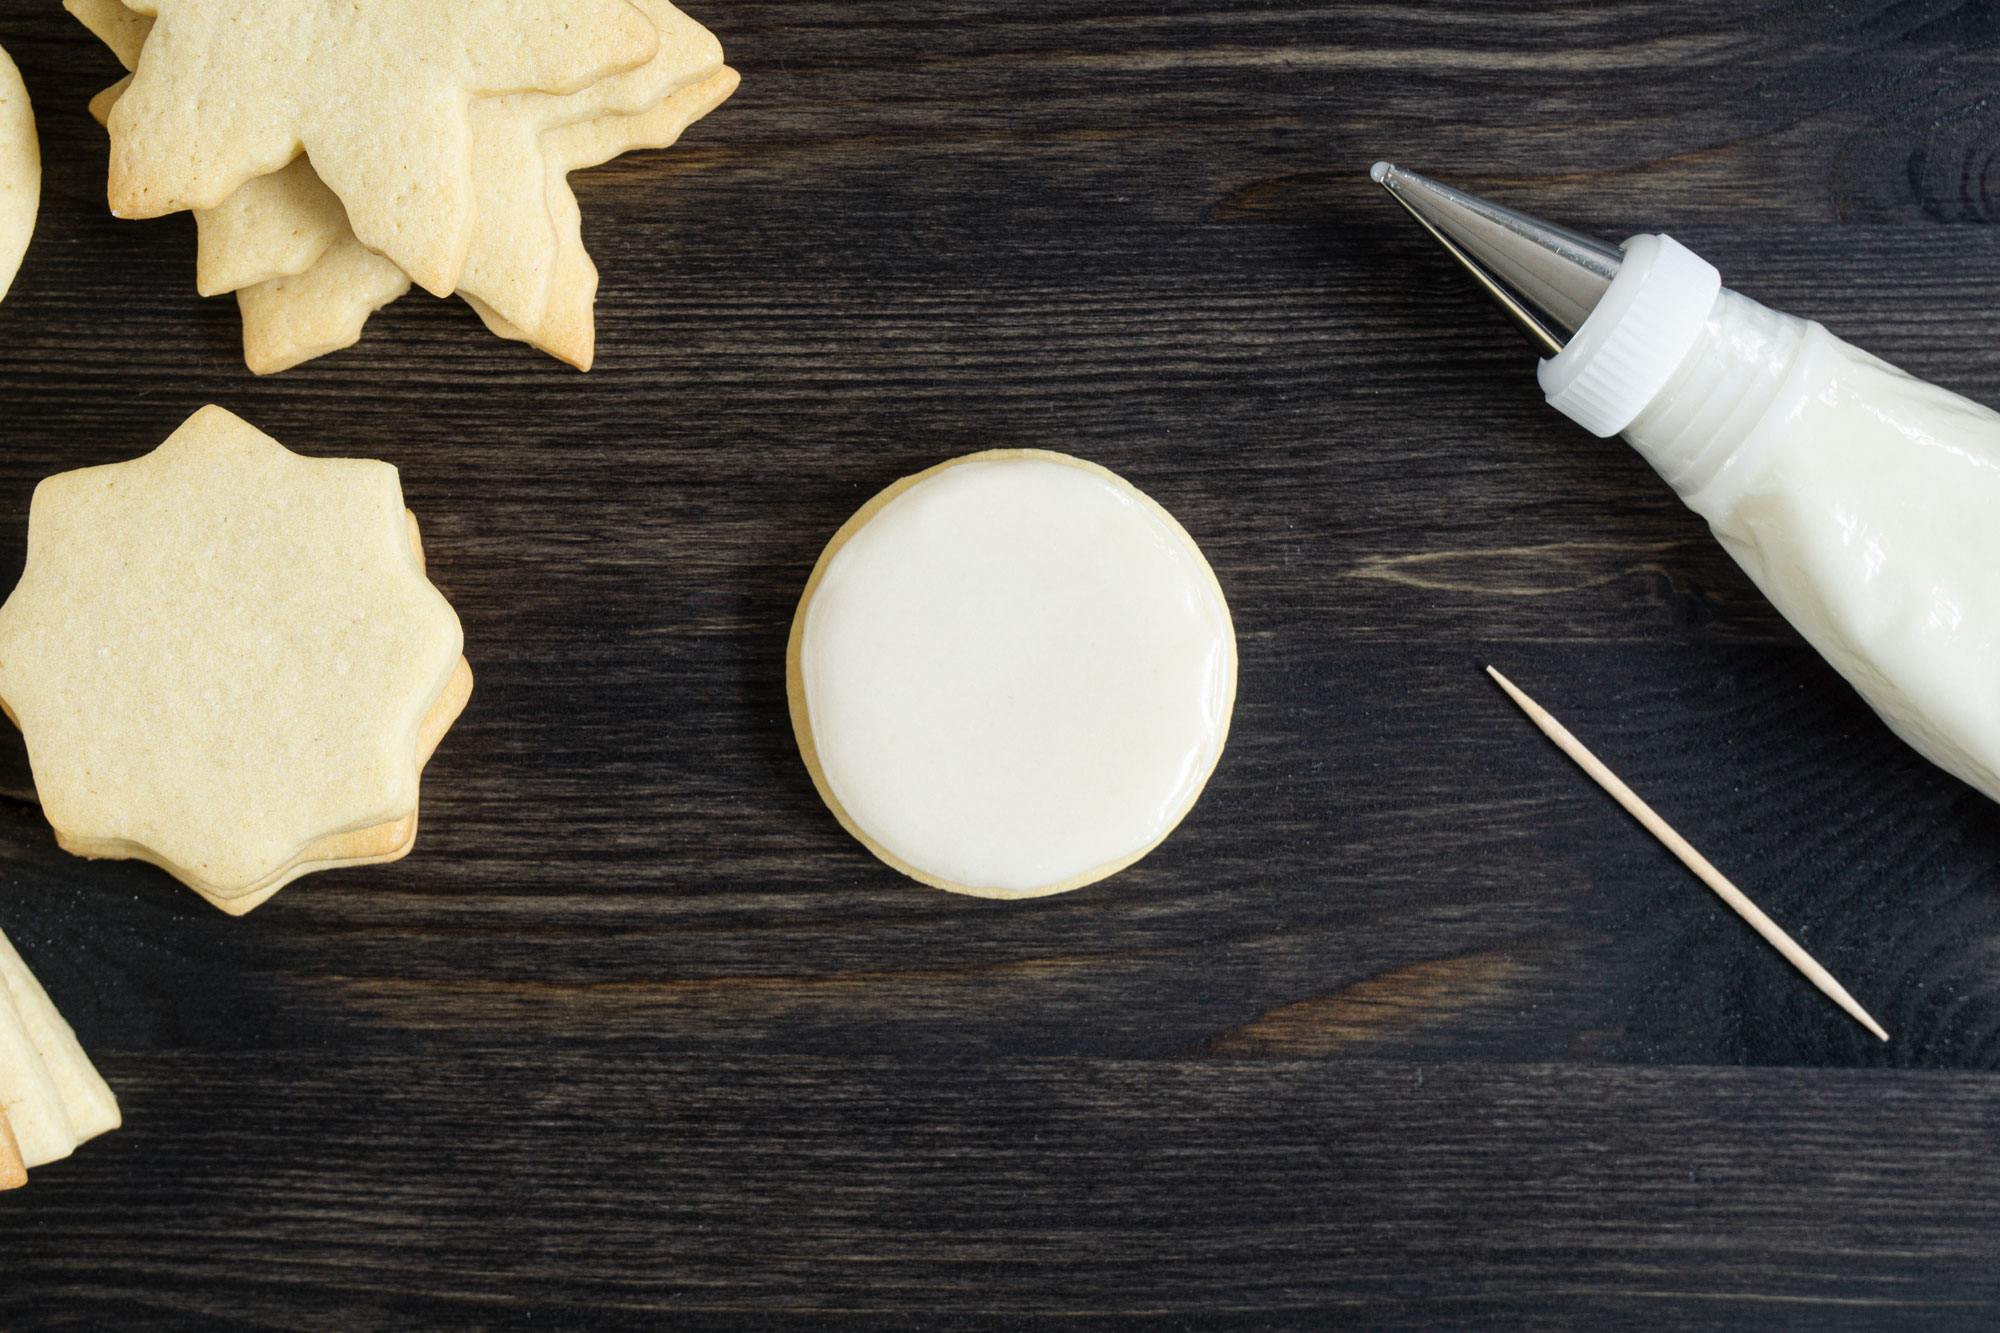
If you are adding sprinkles, do it now so they can stick to the wet icing. If you wish to draw extra details with icing on top, wait for the first icing layer to partly dry, at least until the top gets matte.

7

Leave iced cookies to fully dry and harden on a flat surface at room temperature for at least 12 hours. If you have a few icing layers, wait 24 hours before stacking the cookies.

notes

  • If you add powders to your icing, they can slightly thicken it. To fix this, add extra milk, a few drops at a time, and mix to get the icing back to the right consistency.
  • The opposite thing happens if you use liquid coloring or extra juice. In this case, add a bit extra icing sugar, a teaspoon at a time, and mix till you have the right consistency again.
  • Don’t leave the icing in the open air or it will start crusting quickly. When not in use, cover it well with plastic wrap or keep it in an airtight container. When not using a piping bag, cover the piping tip with a wet paper towel, or crusting icing can clog the tip.
  • It’s best to use this icing the same day, but you can also store it in an airtight container in a fridge for up to 2 days. It will slightly thicken, so remix it well before using and if it still looks too thick after mixing, add a drop or two of milk.
  • This amount of icing should be enough to flood ~50 7 cm / 2,8 inch size cookies.
0 0 votes
Rating
Subscribe
Notify of

0 Comments
Inline Feedbacks
View all comments
latest posts
Let's keep in touch
More recipes