Karamelizuotas arba rudasis sviestas yra magiškas ingredientas įprastus kepinius galintis paversti ypatingais. Jo charakteringas skrudintų riešutų ir karamelės skonis sukuriamas tik temperatūros pagalba. Nors karštyje vykstančios cheminės reakcijos gali skambėti sudėtingai, pats procesas – tikrai paprastas! Tereikia šiek tiek žinių, kad karamelizuoti sviestą puikiai pavyktų kiekvieną kartą.
Šiek tiek sviesto karamelizavimo teorijos
Sviesto karamelizavimas yra klasikinė prancūziška technika. Tokį sviestą prancūzai vadina buerre noisette, kas pažodžiui reiškia – lazdyno riešutų sviestas. Žinoma, jame nėra jokių riešutų, o tik chemijos magija. Lietuvių kalboje šiam sviestui vadinti neturime visuotinai priimto termino. Daug kas mėgsta pavadinimą „degintas sviestas“, bet aš manau, kad jis labiau tinka juodajam sviestui (apie jį kiek vėliau). Aš renkuosi vadinti karamelizuotu sviestu vadovaudamasi ta pačia logika kaip ir prancūzai – grynai pagal skonį, bet ne cheminį tikslumą, nes karamelizacijos reakcija kaitinant sviestą iš tiesų nevyksta.

O dabar grįškime prie chemijos. Šviežias sviestas yra „vanduo riebaluose“ tipo emulsija, kurioje yra šiek tiek sausųjų pieno medžiagų, sudarytų iš baltymų ir pieno cukraus (laktozės). Sviesto karamelizavimo procesas yra jo kaitinimas iki tam tikro lygio, kol suskyla emulsija, išgaruoja vanduo ir sausosios pieno medžiagos paskrudinamos. Panagrinėkime šį procesą detaliau.
1. Sviesto lydymas: subyra emulsija
Lydant sviestą, karštis originalią sviesto emulsiją suskaldo į tris atskiras dalis: grynus sviesto riebalus, vandenį ir sausąsias pieno medžiagas. Karštyje pieno baltymai denatūruoja ir sukimba į didesnius darinius, ką vizualiai matome kaip baltą putą sviesto paviršiuje. Ją ten laiko garuojantis vanduo.
2. Virimas: vanduo išgaruoja
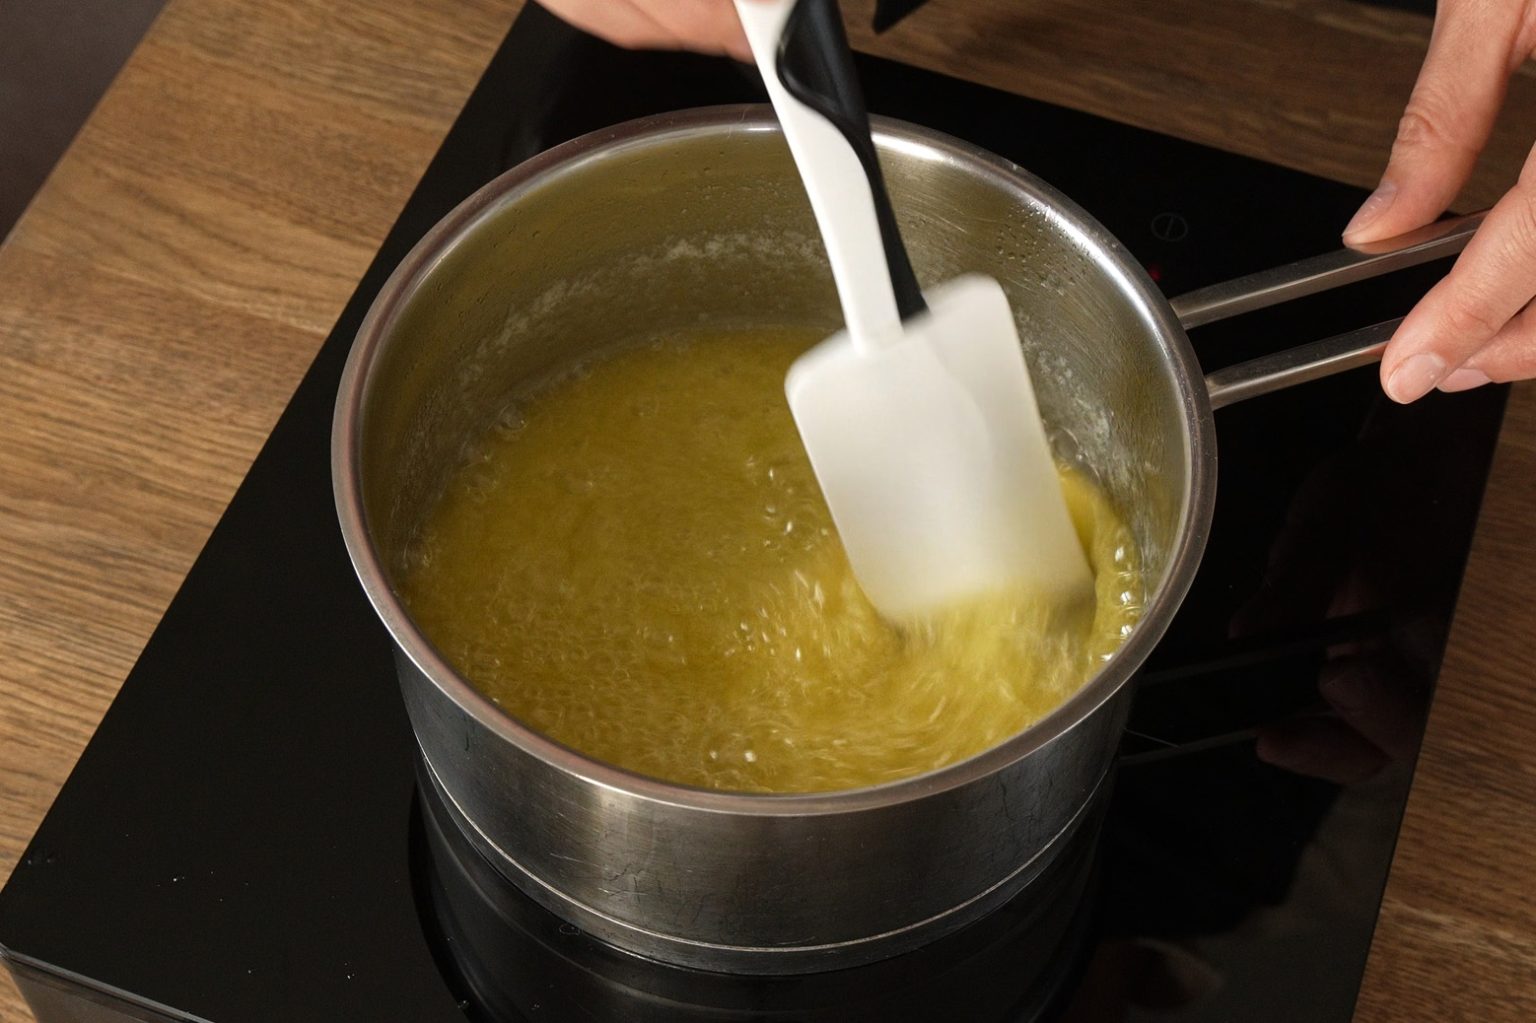
Kai sviestas pasiekia vandens virimo temperatūrą, prasideda intensyvus kunkuliavimas. Greitai kylantys vandens garų burbulai baltyminę putą sumaišo su skystais riebalais ir šiame etape kaitinamas sviestas atrodo beveik skaidrus.
3. Skrudinimas: vyksta Maillardo reakcija
Kai beveik visas vanduo išgaruoja, kunkuliavimas nuslopsta. Vandens garų, kurie sausąsias pieno medžiagas putos pavidalu laikė sviesto paviršiuje, nebėra, tad tos pieno dalelės nusėda į dugną. Kadangi sviesto temperatūra jau gerokai virš 100°C, tarp pieno baltymų ir cukraus pradeda vykti Maillardo reakcija. Tai ta pati reakcija, atsakinga už rudavimą ir skonio kitimą daugelyje maisto produktų, tokių kaip mėsos kepsniai, skrudinta duona ar kavos pupelės. Ši reakcija išskiria šimtus naujų aromatinių komponentų, kurie ir sukuria charakeringą rudą karamelizuoto sviesto spalvą ir išskirtinį skonį.
Kad suprastumėte, kuriame etape yra jūsų kaitinamas sviestas ar kada nustoti jį virti, nereikia jokių ypatingų įrankių. Pilnai užtenka žinoti, kaip ir kada sviestas turi atrodyti. Detaliai visus žingsnius aprašiau žemiau esančiame recepte.
Ar reikia karamelizuotą sviestą nukošti?
Trumpas atsakymas būtų – galima, bet tikrai nereikia. Karamelizuoto sviesto savybė – daug mažų rudų, skrudintų pieno dalelių, būtent kuriose ir įvyko Maillardo reakcija. Šios dalelės yra pagrindinis skonio šaltinis. Reakcijos metu susiformavę aromatiniai komponentai legvai tirpsta riebaluose, tad netgi jei rudas daleles nukoštumėt, likęs sviestas turėtų šiek tiek karamelės skonio. Bet jeigu jas paliksite, taip garantuosite maksimalų skonio intensyvumą, nes skrudintos pieno dalelės yra tarsi koncentruotos skonio bombos. Turbūt didžiausias nukošimo privalumas būtų tai, kad gryni sviesto riebalai galiotų gerokai ilgiau. Bet deja, charakteringas karamelizuoto sviesto skonis su laiku silpsta, tad jį laikyti labai ilgai tiesiog nėra prasmės. Mano patarimas būtų skrudintas daleles palikti ten, kur joms ir vieta – karamelizuotame svieste.
Karamelizuotas (rudasis) ar degintas (juodasis) sviestas?
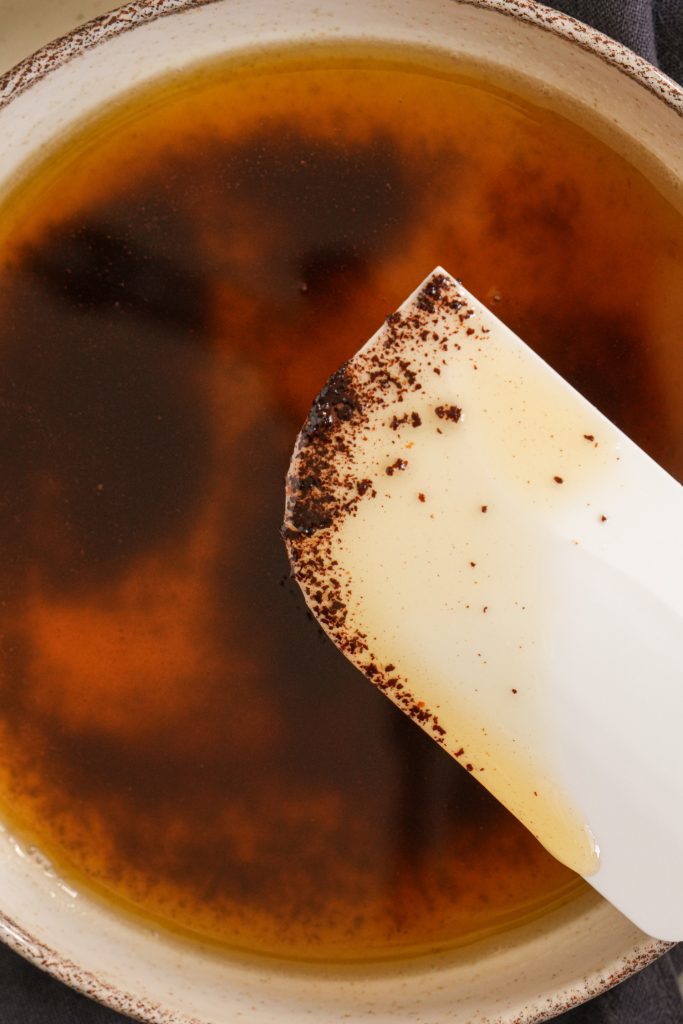
Jeigu sviestą kaitinsite per ilgai, pieno dalelės pradės juoduoti – sudeginsite sviestą. Bet stipriai nepergyvenkite ir sviesto neišmeskite, tokį taip pat galima naudoti! Degintas arba juodasis sviestas turi kartumo ir dūmo skonį, ir kartais yra naudojamas padažams, tad kodėl su tuo nepaeksperimentavus? O jeigu pajuodavusias daleles nukošite, pašalinsite didžiausią kartumo šaltinį ir likusį sviestą vis dar galėsite naudoti maisto gaminimui ar kepiniams.
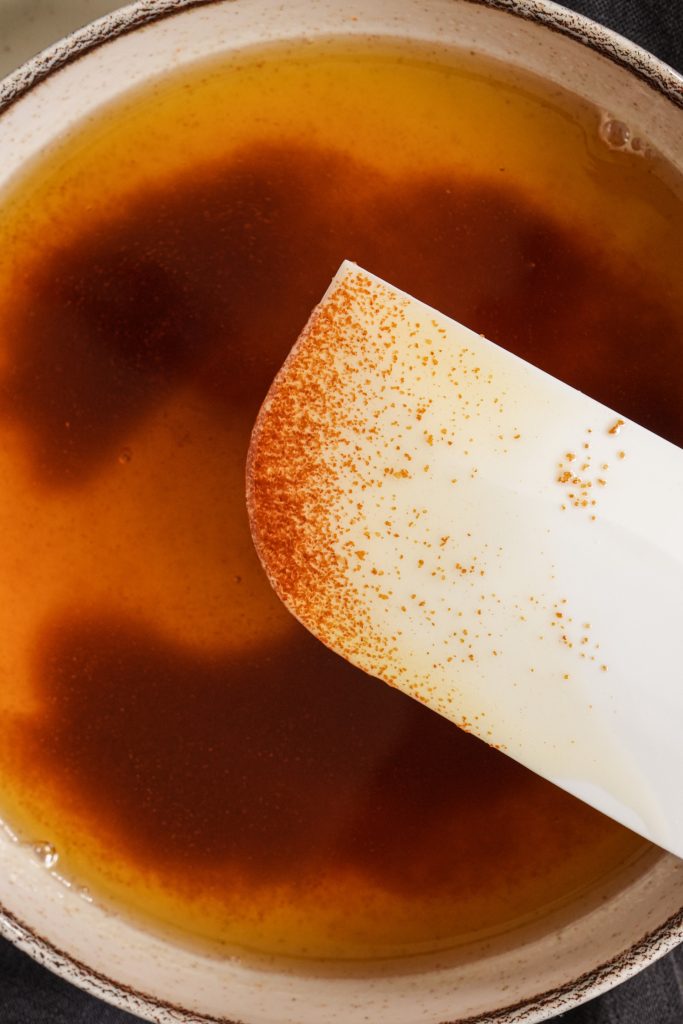
Teisingai karamelizuotas sviestas
Sudegintas sviestas
Kokį sviestą galima karamelizuoti?
Vienintelis reikalavimas – naudoti tikrą, kokybišką karvės pieno sviestą. Tinka netgi sviestas be laktozės, nes jame vis tiek yra cukrų (gliukozės ir galaktozės), kurie dalyvaus Maillardo reakcijoje.
Kaip naudoti karamelizuotą sviestą
Karamelizuotu sviestu galite keisti įprastą sviestą daugumoje kepinių receptų, nepriklausomai reikalingas lydytas ar minkštas sviestas. Jeigu receptui sviestą reikia plakti su cukrumi, tiesiog palaukite ilgiau, kol karamelizuotas sviestas pakankamai atvės ir pradės kietėti. Desertuose, kurie turi kitų intensyvaus skonio ingredientų, karamelizuoto sviesto skonio gali nesijausti, tad jį naudoti ne visada verta.
Karamelizuotas sviestas (Brown butter / Buerre noisette)
- Draugiška pradedantiesiems
Karamelizuoto sviesto skonis primena skrudintus riešutus ir karamelę. Tai magiškas ingredientas įprastus kepinius galintis paversti ypatingais.
Pasiruošimo laikas: 5 min
Virimo laikas: 10 min
Visas laikas: 15 min
Ingredientai
- 200 g sviesto (82%)
Išeiga: ~170 g
Gaminimo eiga
1.
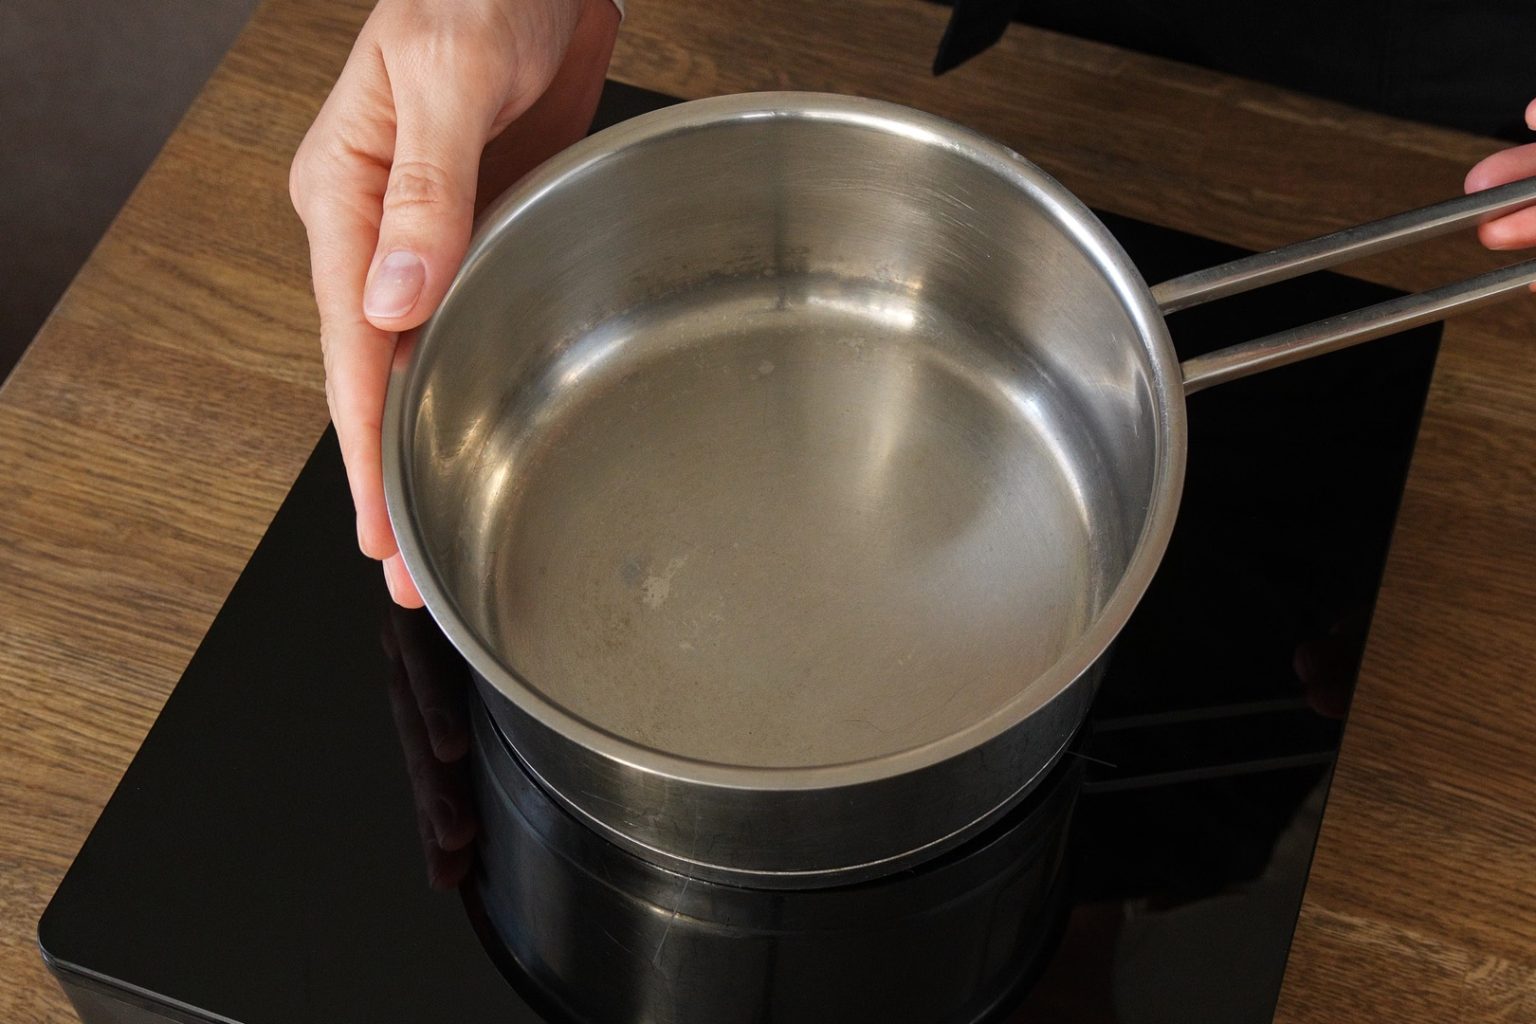
Naudokite šviesios spalvos puodą ar keptuvę, kad aiškiai matytumėte spalvos pokytį. Greta viryklės pasidėkite karčiui atsparų dubenėlį.
2.
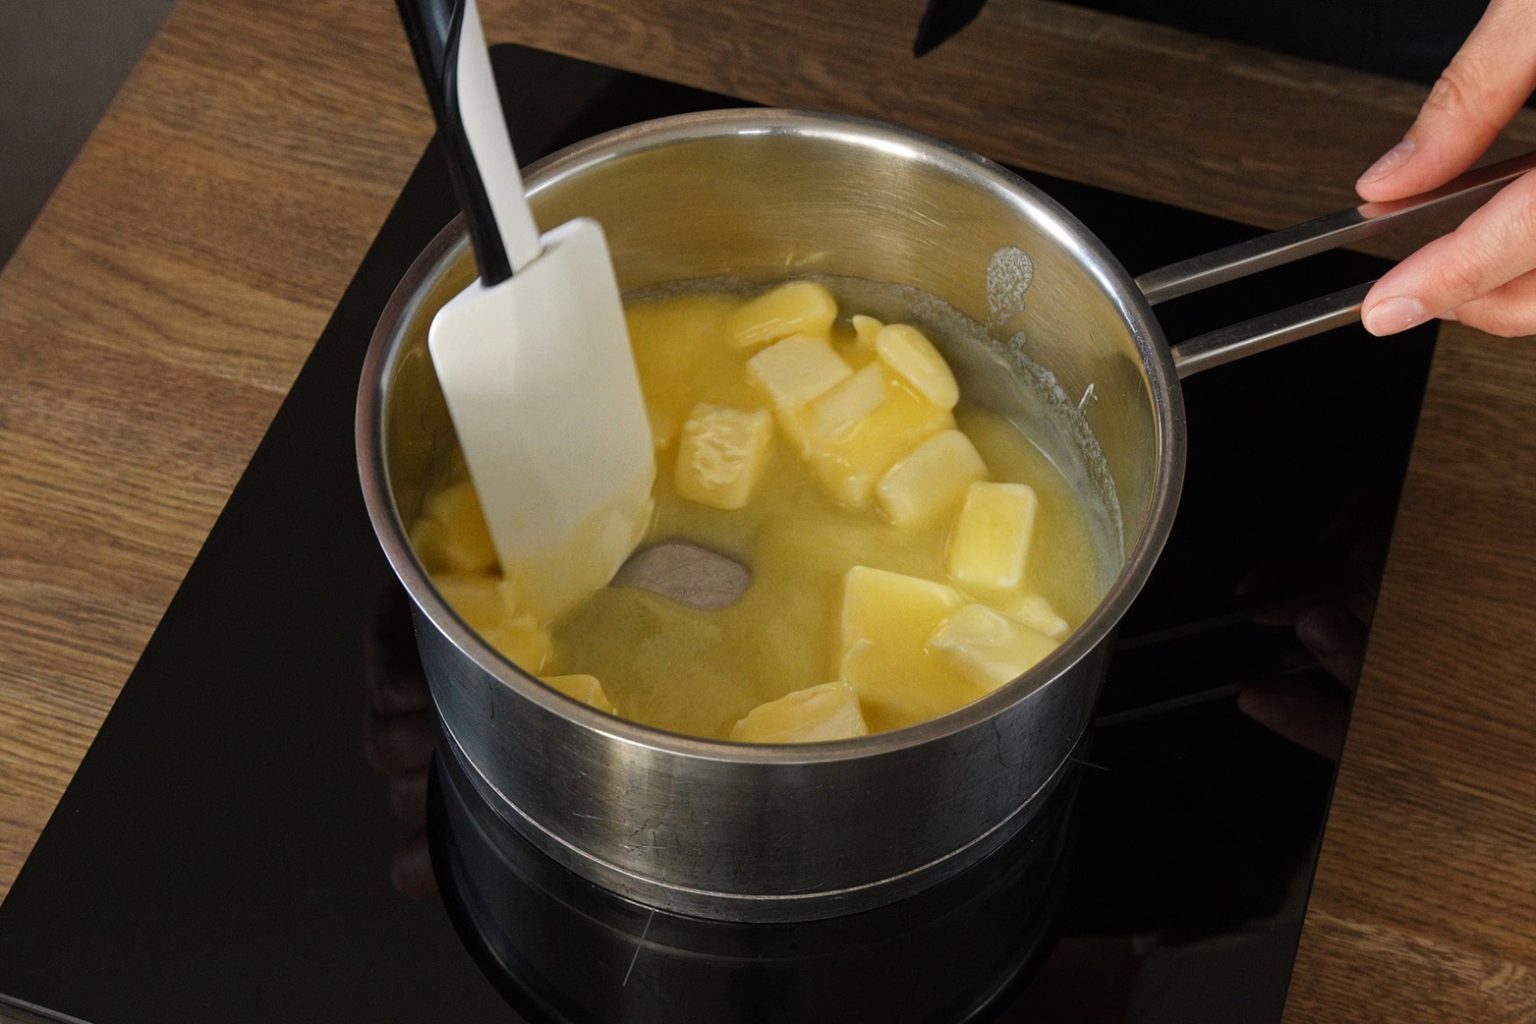
Sviestą supjaustykite kubeliais ir dėkite į puodą. Virš vidutinės kaitros lydykite sviestą pamaišydami, kad jis šiltų tolygiai.
3.
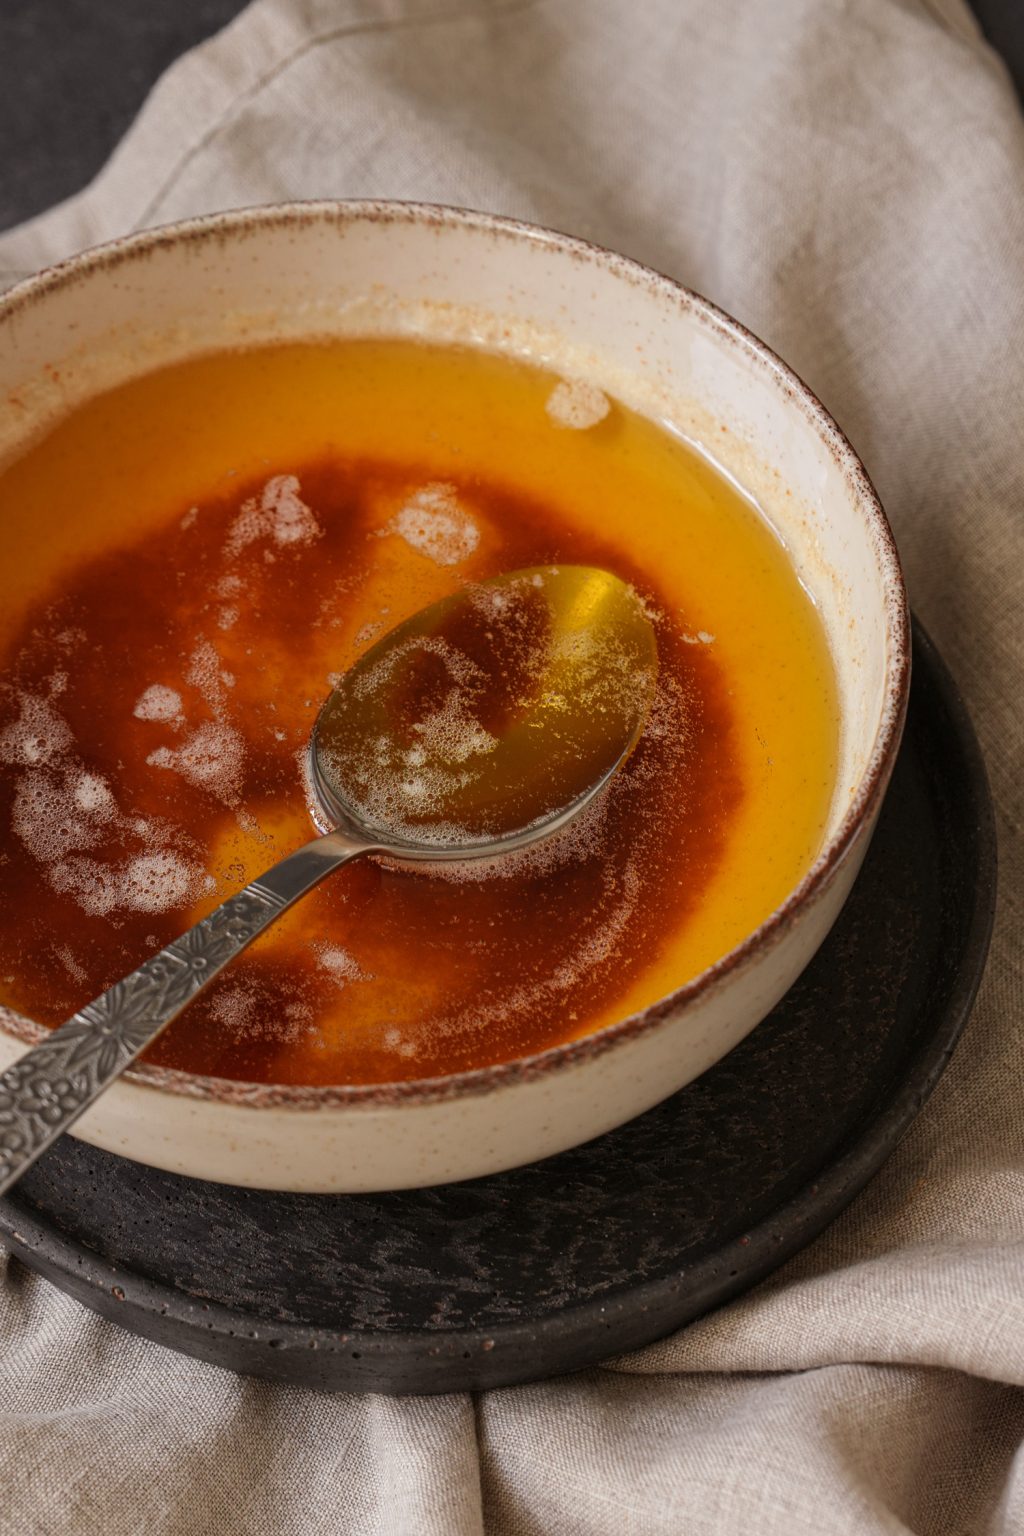
Sviestui pilnai išsilydžius, toliau kaitinkite ir maišykite. Pieno dalelės atsiskirs nuo riebalų ir sviesto paviršiuje suformuos baltą putą.
4.
Netrukus sviestas pradės kunkuliuoti (užvirs jame esantis vanduo), puta susimaišys su burbuliuojančiais riebalais ir sviestas atrodys praktiškai skaidrus. Girdėsite traškėjimą. Nenustokite maišyti.
5.
Kai traškėjimas pradės tilti, vandens garų burbulai sumažės ir pradės paviršiuje formuoti putą – pabaiga jau netoli. Pakvips skrudintais riešutais ir karamele. Maišykite greičiau, kad po puta matytumėte pieno dalelių spalvą. Kai jos taps auksiniai rudos spalvos, patraukite sviestą nuo kaitros.

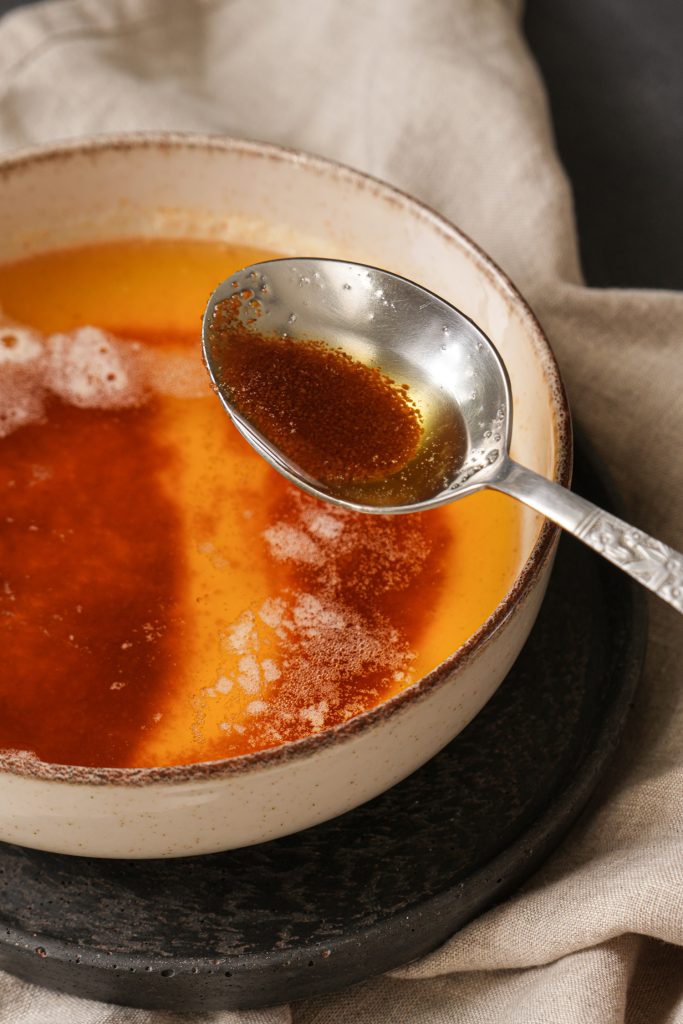
6.
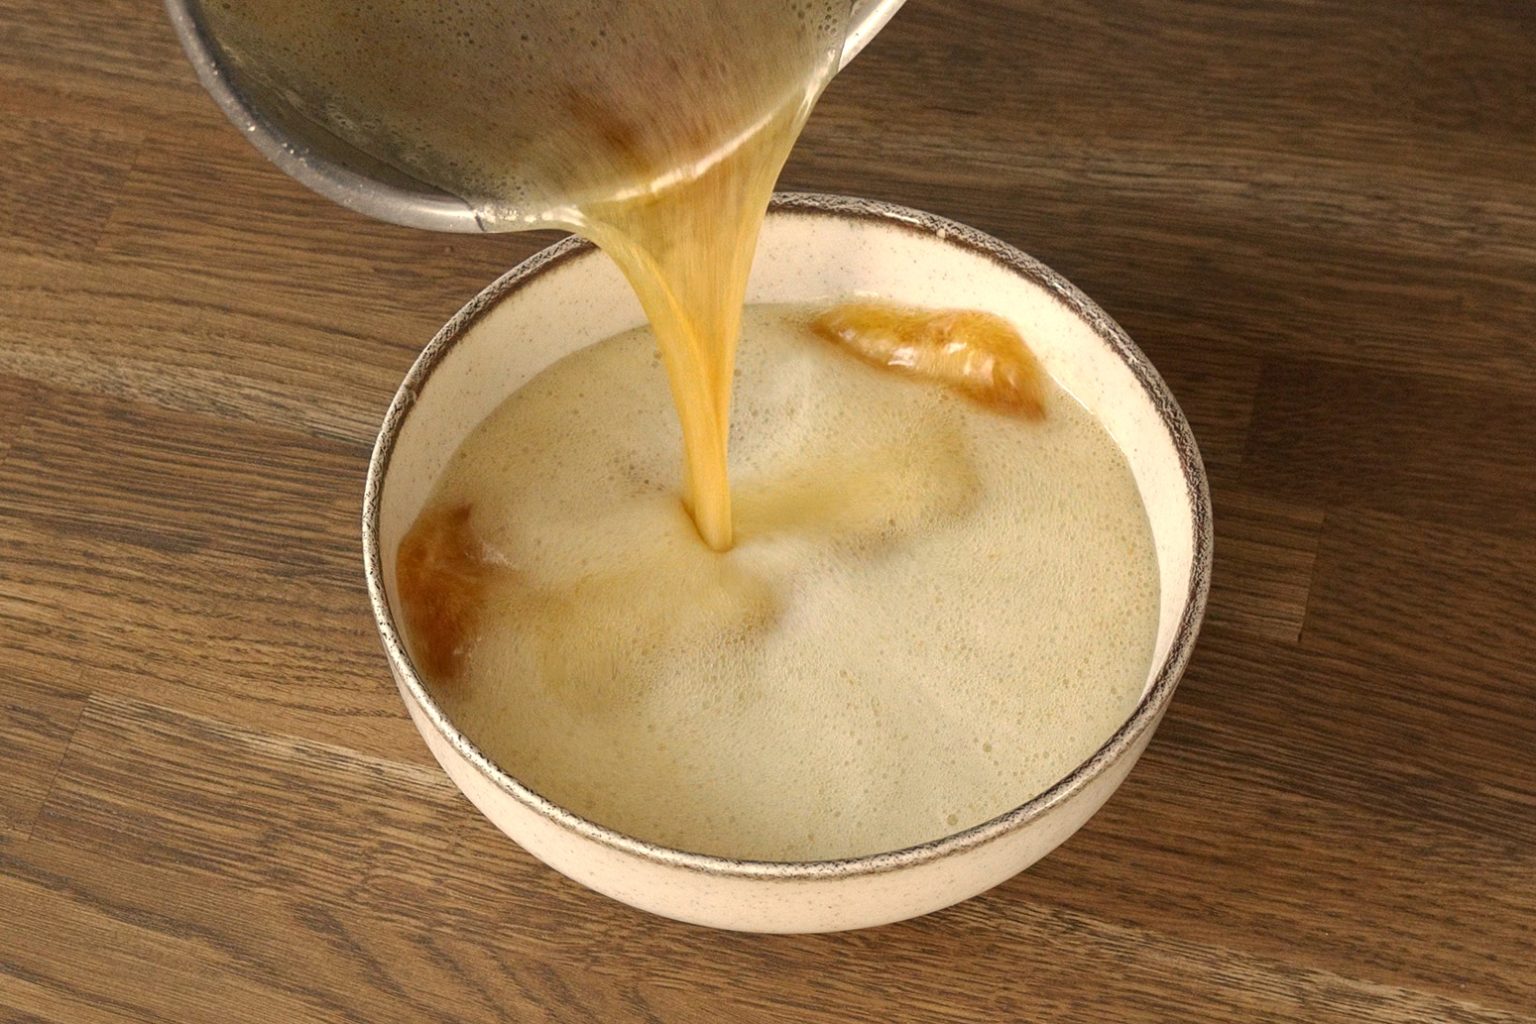
Iš karto perpilkite sviestą iš puodo į vėsų dubenėlį, kad sustabdytumėte temperatūros kilimą ir sveistas nesudegtų. Iškrapštykite ir visas rudas daleleles. Ant paviršiaus esanti puta netrukus išsisklaidys.

7.
Jeigu receptui reikia lydyto sviesto, galite jį naudoti, kai tik pravės ir nebebus karštas (40-50°C). Jeigu minkštą sviestą reikia plakti su cukrumi, tuomet palaukite ilgiau, kol pilnai atvės ir sutirštės.
Dar keli patarimai, kad tikrai pavyktų
- Nepersistenkite su viryklės kaitra, nes taip didesnė tikimybė, kad sviestą sudeginsite. Lėtai ir tolygiai šildykite virš vidutinės kaitros.
- Nuolatinis sviesto maišymas padeda karščiui pasiskirstyti tolygiau. Tai ypatingai svarbu prasidėjus virimui ir pieno dalelėms nusėdus į dugną, nes jos gali prikibti ir sudegti.
- Tikslus kaitinimo laikas priklausys nuo sviesto kiekio, puodo, kurį naudojate, ir jūsų viryklės. Pasikliaukite sviesto vaizdu, o ne laikmačiu.
- Karamelizuojamas sviestas įkaista bent iki 140°C, tad būkite atsargūs, nenusideginkite ir nepilkite jo tiesiai iš puodo į pyrago tešlą.
- Jei netyčia sviestą sudeginote ir pieno dalelės pajuodavo, nukoškite jas ir likusį sviestą dar galite naudoti. Bet be pieno dalelių jo skonis bus silpnesnis.
- Karamelizuojant 82% sviestą, jo pradinis svoris sumažėja maždaug 15% (tiek vandens išgaruoja).
- Jeigu planuojate sviestą naudoti vėliau, jam pradėjus tirštėti, gerai išmaišykite, kad skrudintos pieno dalelės tolygiai pasiskirstytų po visą sviestą. Taip ir skonio pasiskirstymas bus tolygesnis.
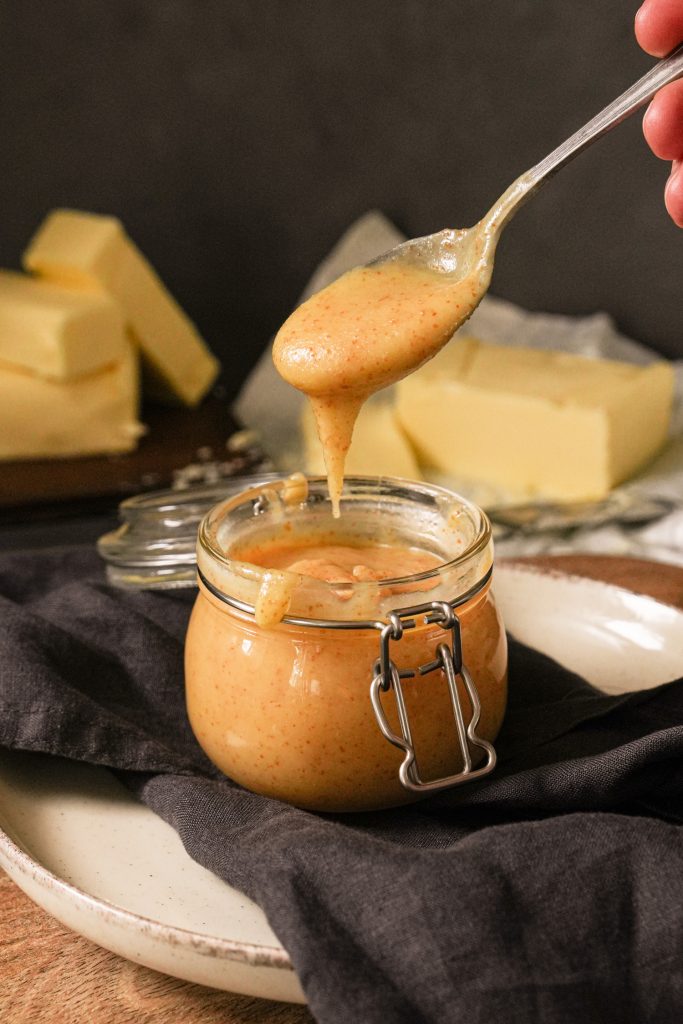
Laikymo nurodymai
Karamelizuoti sviestą galite iš anksto. Laikykite jį uždarame inde šaldytuve iki 2 savaičių. Dar bus saugus vartoti visą mėnesį, bet šviežesnio sviesto skonis – intensyvesnis. Prieš naudodami karamelizuotą sviestą išlydykite arba atšildykite iki kambario temperatūros.
Jeigu norite išlaikyti dar ilgiau – užšaldykite. Šaldiklyje sandariai laikomas karamelizuotas sviestas intensyvų skonį išlaikys 3 mėnesius.